以 Gradle 与 Kotlin/JVM 入门
本教程演示了如何通过 InteliJ IDEA 和 Gradle 来创建一个 JVM 控制台应用程序。
首先,请先下载最新版本的 IntelliJ IDEA。
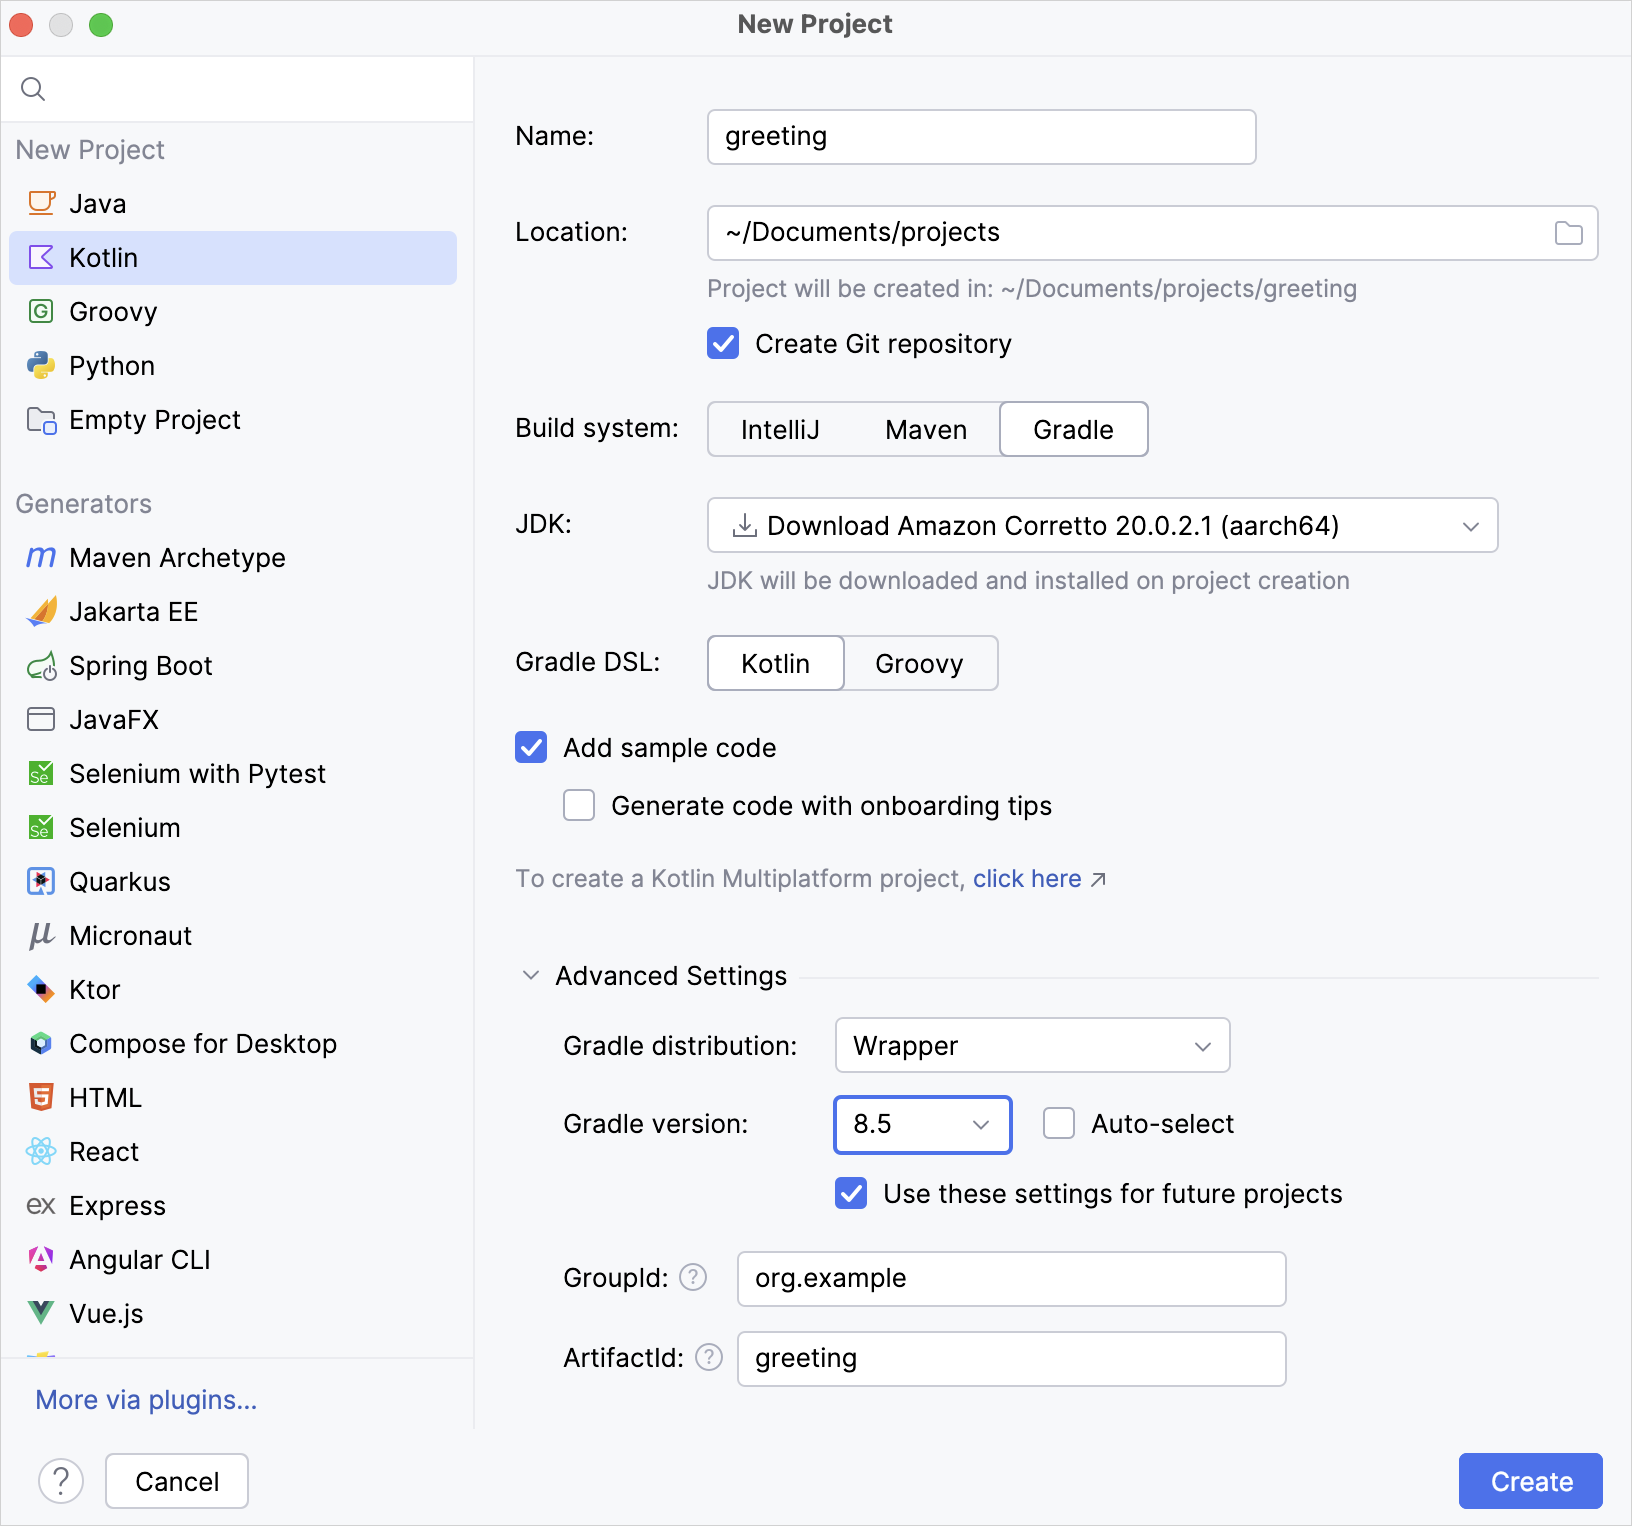
创建项目
- 在 IntelliJ IDEA 中选择文件 | 新建 | 项目。
- 在面板的左侧,选择Kotlin。
根据需要修改项目的名称和位置。
勾选创建 Git 仓库来让你的项目弃启用版本控制。 你也可以在项目创建之后再来创建。

在构建系统这一行选择 Gradle。
在 JDK 这一行选择你想要应用在项目中的 JDK 版本。
- 如果你的计算机中已经安装了 JDK,但是 IDE 并没有识别。选择添加 JDK 并选择JDK 的 Home 路径。
- 如果你的计算机中尚未安装 JDK,选择 下载 JDK。
Select the Kotlin DSL for Gradle.
勾选添加示例代码来创建一个初始的
"Hello World!"应用。You can also enable the Generate code with onboarding tips option to add some additional useful comments to your sample code.
点击创建。
你已经成功创建了一个 Gradle 项目!
Specify a Gradle version for your project
You can explicitly specify a Gradle version for your project under the Advanced Settings section, either by using the Gradle Wrapper or a local installation of Gradle:
- Gradle Wrapper:
- From the Gradle distribution list, select Wrapper.
- Disable the Auto-select checkbox.
- From the Gradle version list, select your Gradle version.
Local installation:
- From the Gradle distribution list, select Local installation.
For Gradle location, specify the path of your local Gradle version.
探索构建脚本
打开 build.gradle.kts 文件。这个是 Gradle Kotlin的构建脚本,它包含了和 Kotlin 相关的配置以及应用所需的其他部分。
plugins {
    kotlin("jvm") version "2.1.21" // Kotlin version to use
}

group = "org.example" // 公司域名,例如:`org.jetbrains`
version = "1.0-SNAPSHOT" // 构建工件的版本号

repositories { // 依赖的源,见下方 1️⃣ 注释
    mavenCentral() // Maven 中心仓库,见下方 2️⃣ 注释
}

dependencies { // 项目中需要用到的库,见下方 3️⃣ 注释
    // 在仓库在找到你需要的依赖,并将他们的依赖添加代码复制到这里
    testImplementation(kotlin("test")) // Kotlin 的测试库
}

tasks.test { // 见下方 4️⃣ 注释
    useJUnitPlatform() // 用于测试的 JUnitPlatform 依赖,见下方 6️⃣ 注释
}
- 1️⃣ 了解更多关于依赖源的信息。
- 2️⃣ Maven 中心仓库也可以使用 Google 的 Maven 仓库或者公司的私有仓库替代。
- 3️⃣ 了解更多关于依赖声明的信息。
- 4️⃣ 了解更多关于任务的信息。
- 5️⃣ 用于测试的 JUnitPlatform.
如你所见,在 Gradle 的构建文件中也有一些关于 Kotlin 的配置项:
在
plugins {}块中,有一行kotlin("jvm")。这个插件定义了项目中所用的 Kotlin 版本。在
dependencies {}块中,有一行testImplementation(kotlin("test"))。 了解更多关于配置用于测试的库的信息。
运行应用
Open the Gradle window by selecting View | Tool Windows | Gradle:
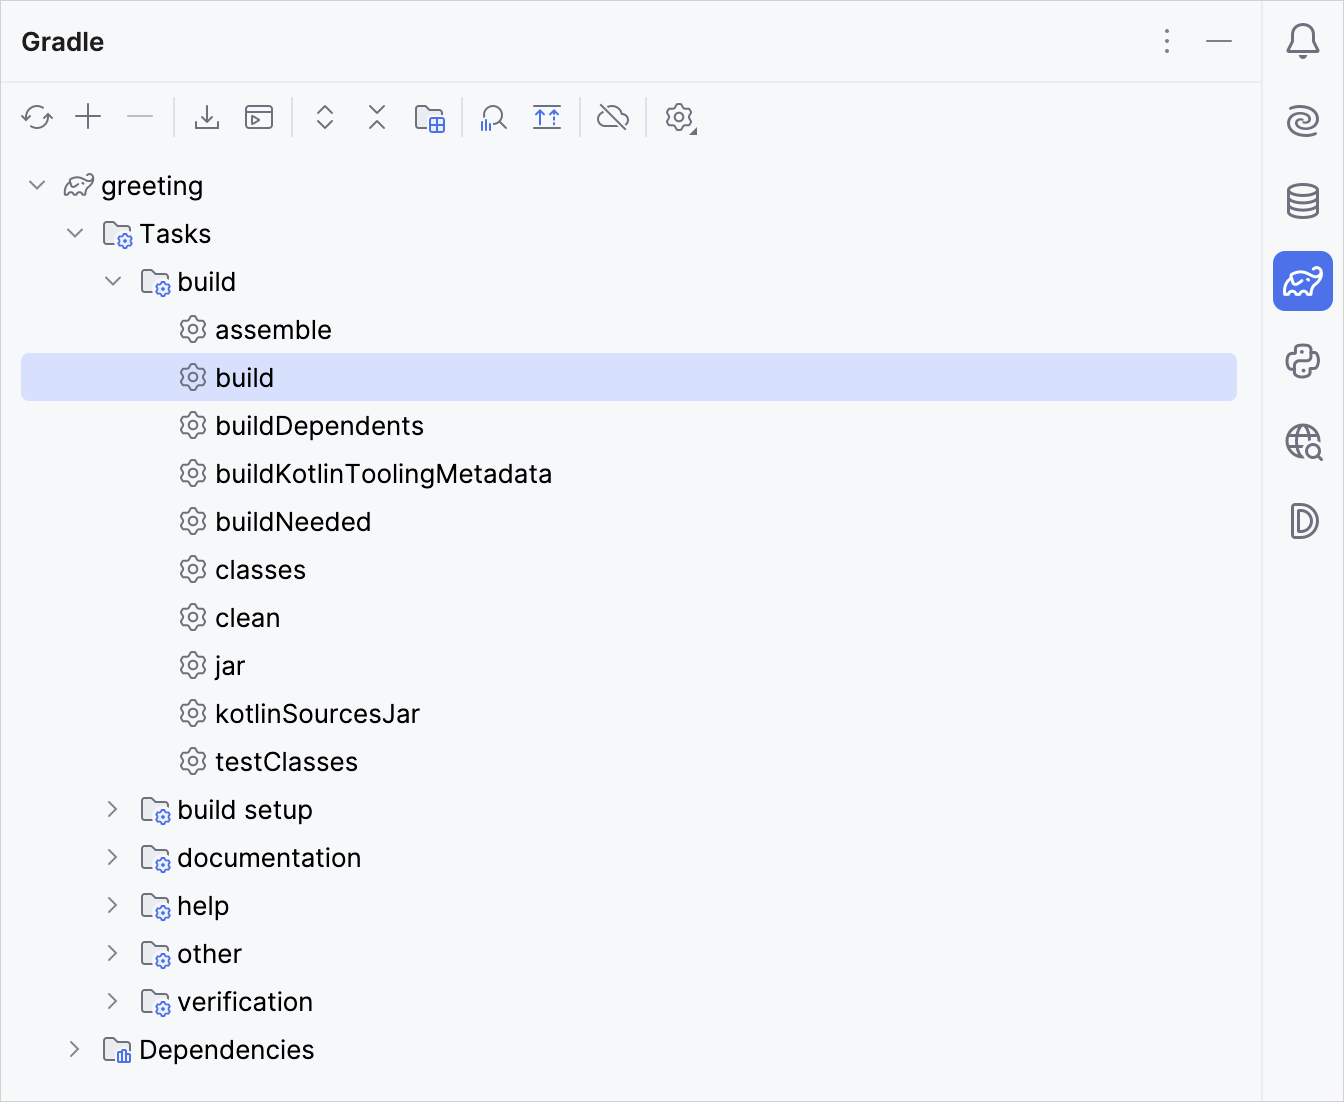
Execute the build Gradle task in
Tasks\build\. In the Build window,BUILD SUCCESSFULappears. It means that Gradle built the application successfully.In
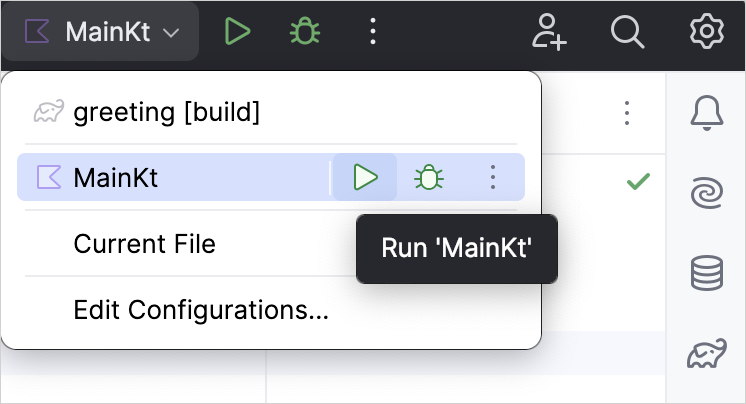
src/main/kotlin, open theMain.ktfile:srcdirectory contains Kotlin source files and resources.Main.ktfile contains sample code that will printHello World!.
Run the application by clicking the green Run icon in the gutter and select Run 'MainKt'.
你可以在运行的窗口中看到结果:
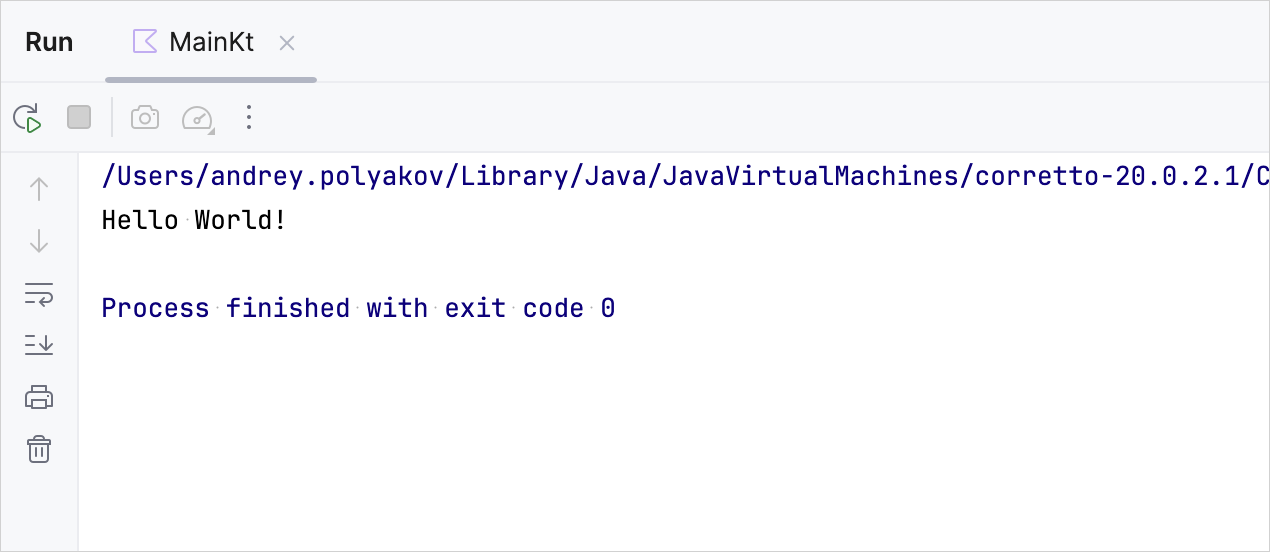
恭喜!你刚刚运行了你的第一个 Kotlin 应用。
下一步做什么?
了解更多关于: