创建第一个 Kotlin Notebook
This is the second part of the Getting started with Kotlin Notebook tutorial. Before proceeding, make sure you've completed the previous step.
![]() Set up an environment
Set up an environment
![]() Create a Kotlin Notebook
Create a Kotlin Notebook
![]() Add dependencies to a Kotlin Notebook
Add dependencies to a Kotlin Notebook
Here, you will learn how to create your first Kotlin Notebook, perform simple operations, and run code cells.
Create an empty project
- In IntelliJ IDEA, select File | New | Project.
- In the panel on the left, select New Project.
Name the new project and change its location if necessary.
Select the Create Git repository checkbox to place the new project under version control. You will be able to do it later at any time.
From the Language list, select Kotlin.
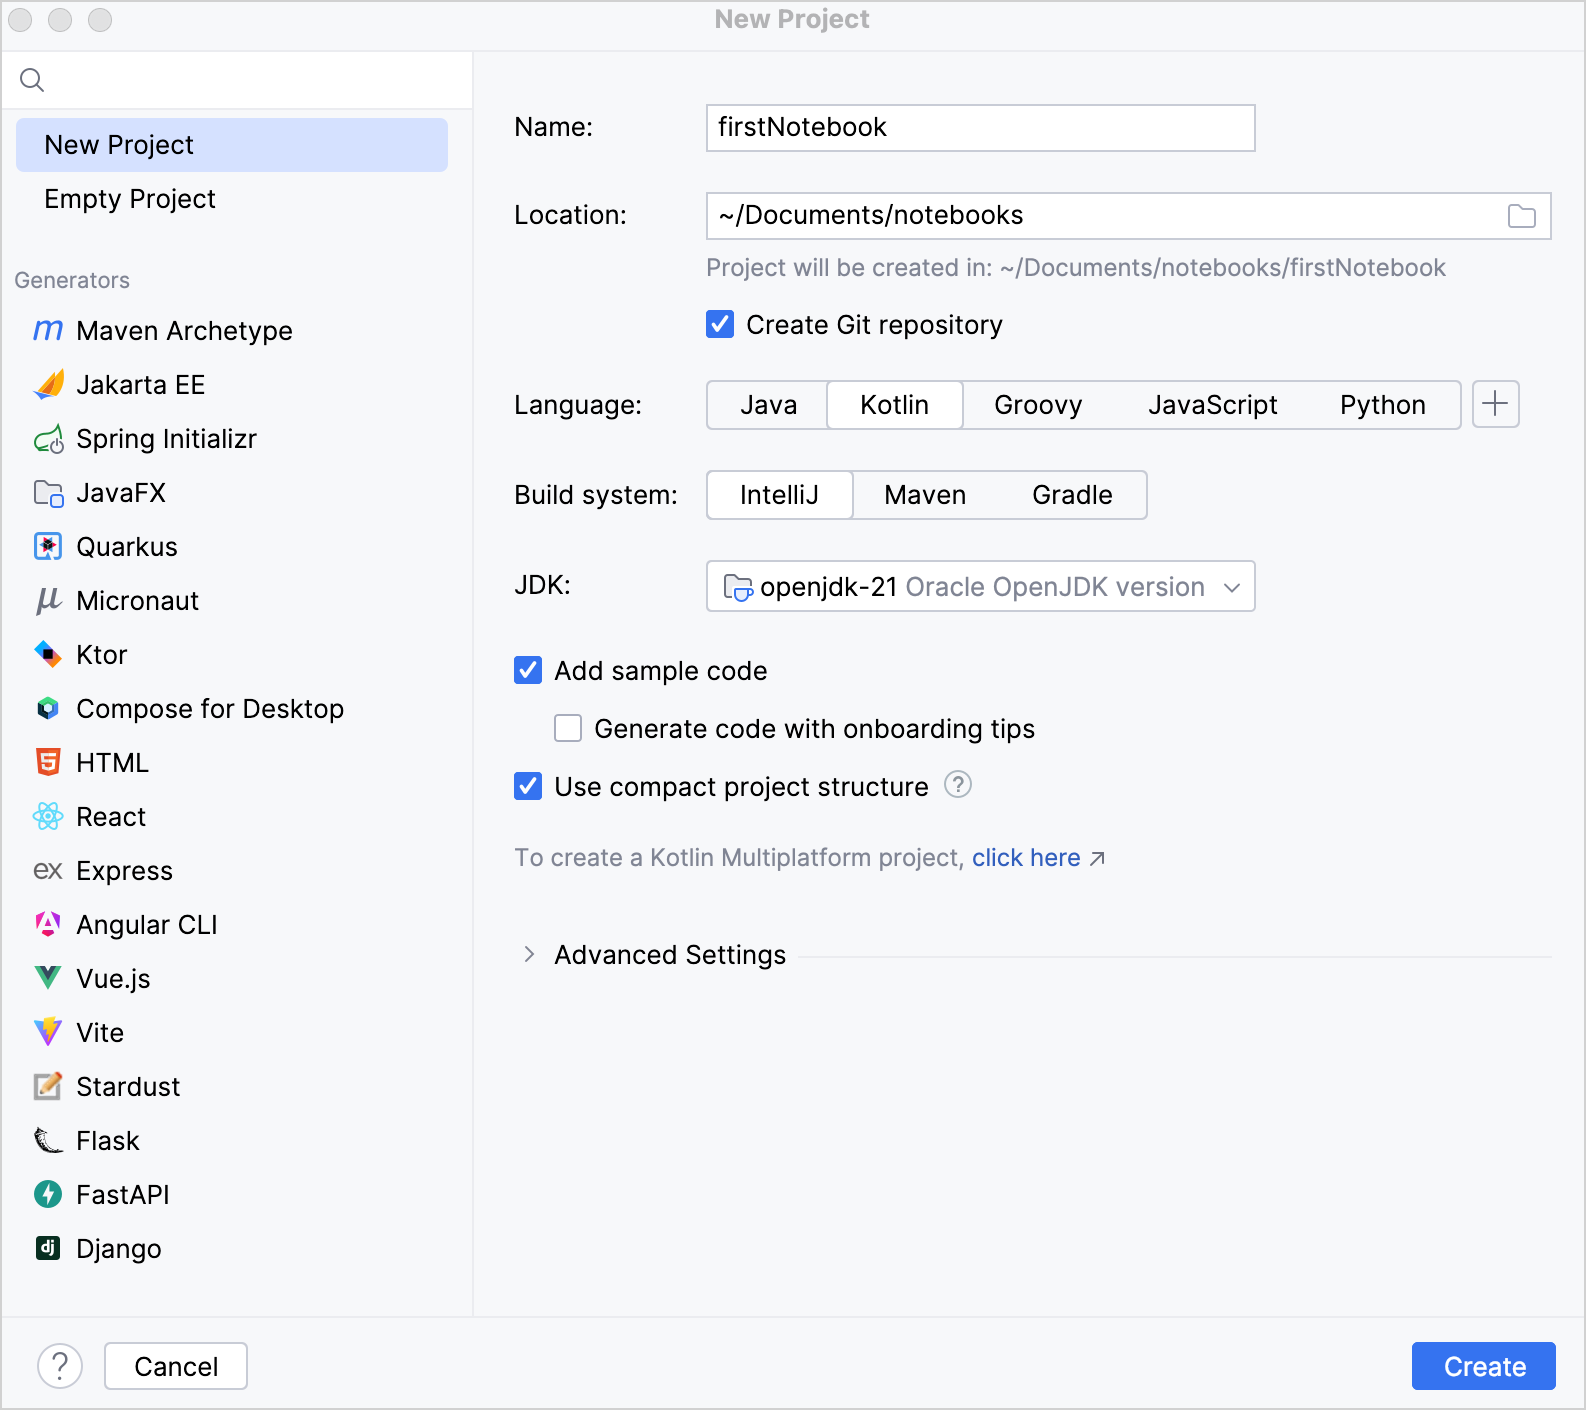
Select the IntelliJ build system.
- From the JDK list, select the JDK that you want to use in your project.
Enable the Add sample code option to create a file with a sample
"Hello World!"application.You can also enable the Generate code with onboarding tips option to add some additional useful comments to your sample code.
Click Create.
Create a Kotlin Notebook
To create a new notebook, select File | New | Kotlin Notebook, or right-click on a folder and select New | Kotlin Notebook.
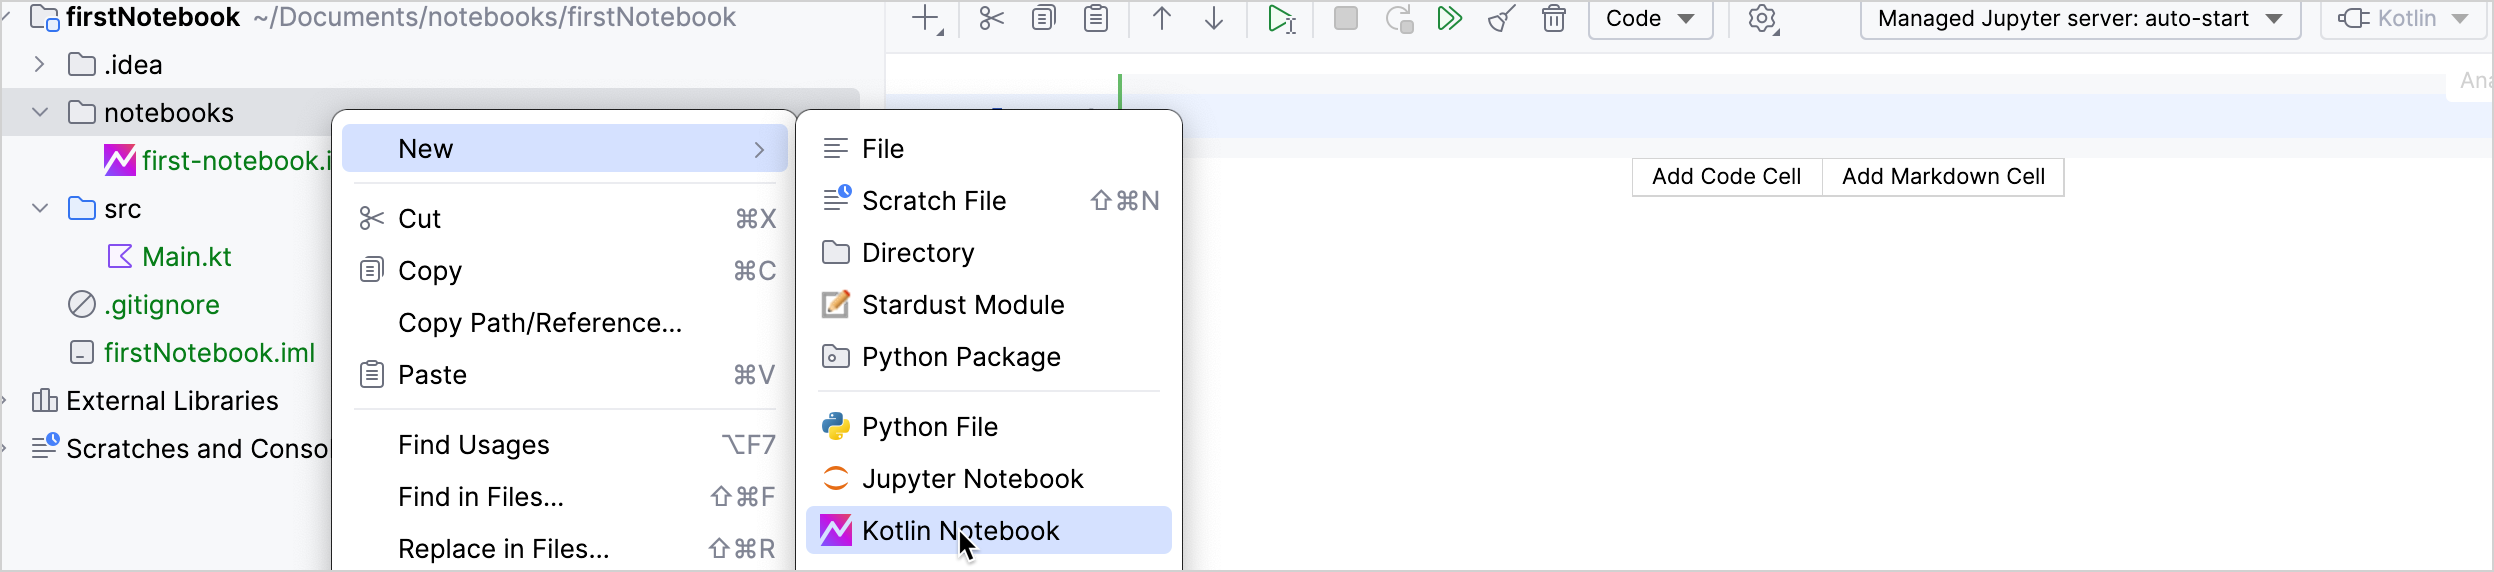
Set the name of the new notebook, for example, first-notebook, and press Enter. A new tab with a Kotlin Notebook first-notebook.ipynb will open.
In the open tab, type the following code in the code cell:
println("Hello, this is a Kotlin Notebook!")- To run a code cell, click the Run Cell and Select Below
 button or press Shift + Return.
 - Add a markdown cell by clicking on the Add Markdown Cell button.
- Type
# Example operationsin the cell, and run it the same way you run code cells to render it. - In a new code cell, type
10 + 10and run it. Define a variable in a code cell. For example,
val a = 100.Once you run a code cell with defined variables, those variables become accessible in all other code cells.
Create a new code cell and add
println(a * a).Run all code and markdown cells in the notebook using the Run All
 button.
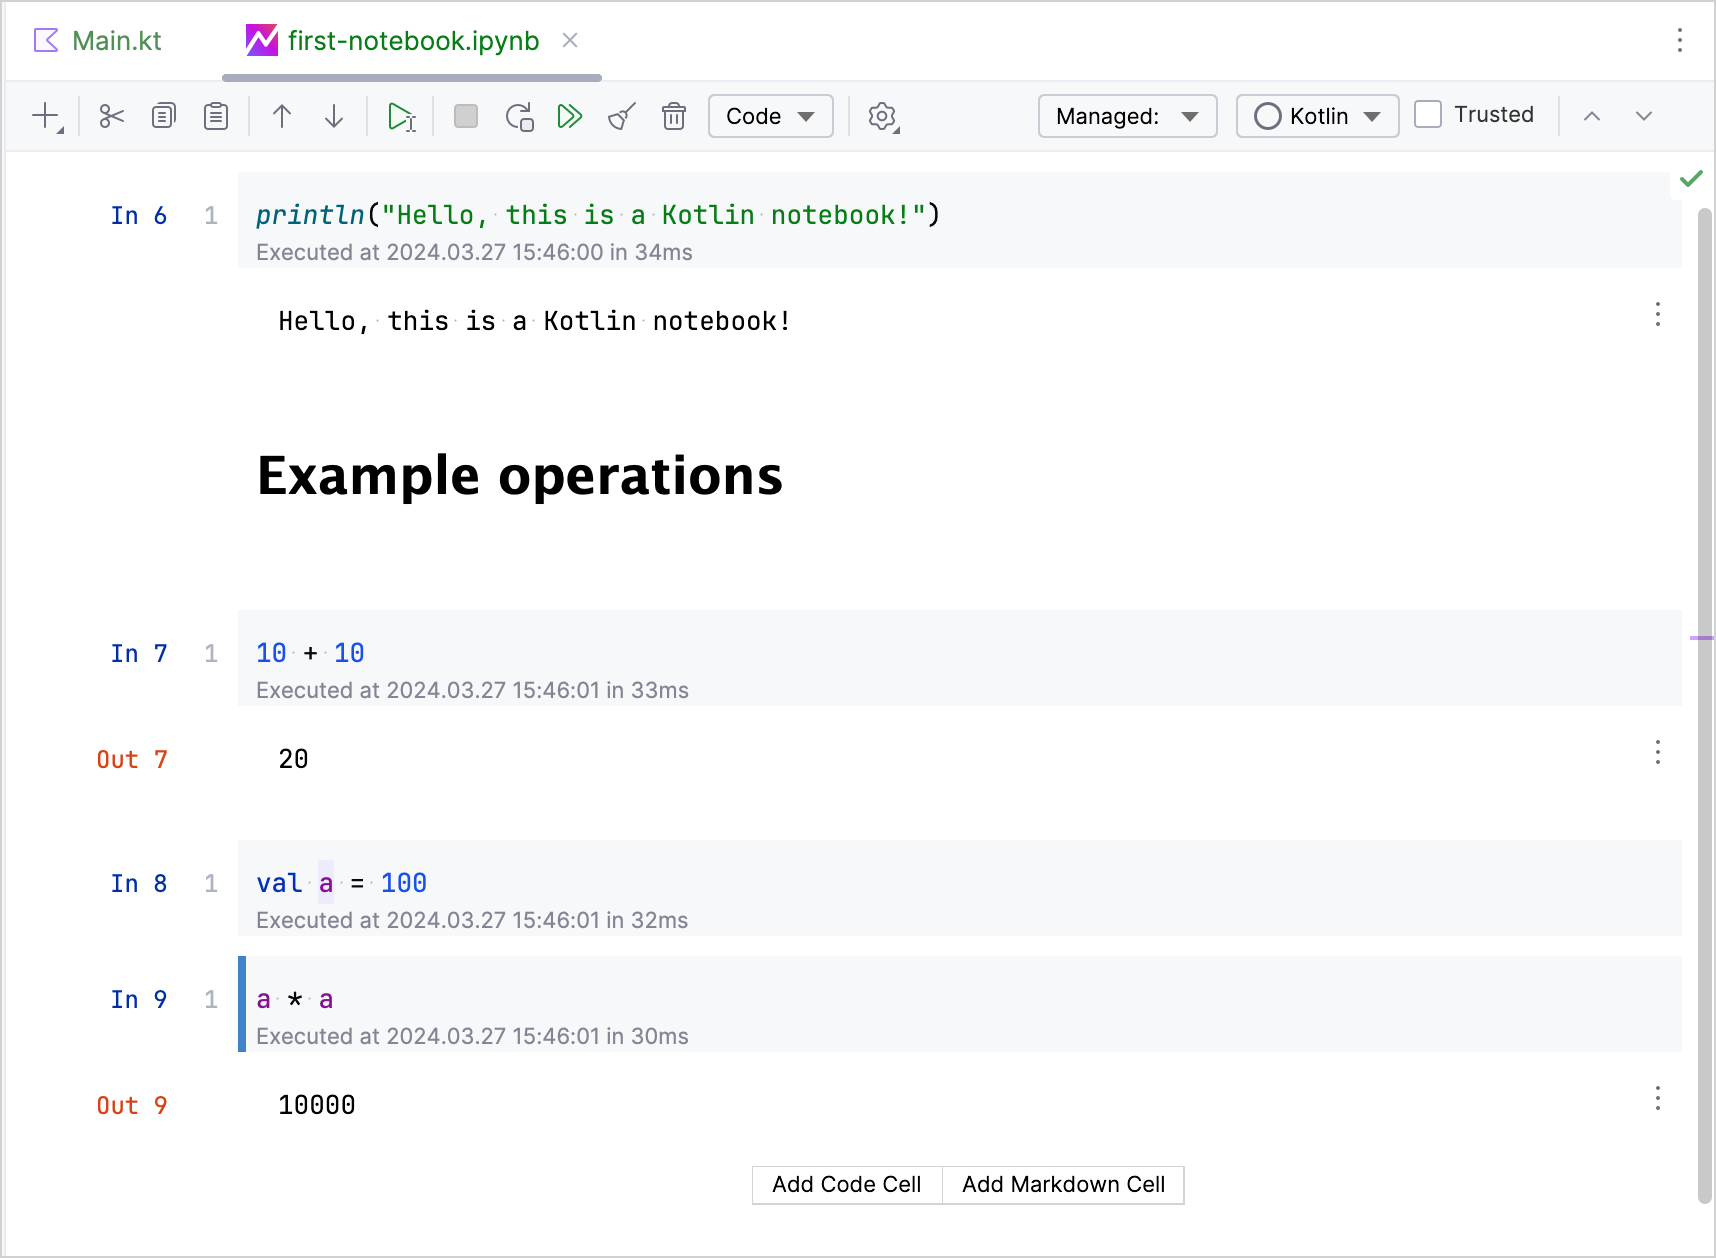
Congratulations! You have just created your first Kotlin Notebook.
Create a scratch Kotlin Notebook
Starting from IntelliJ IDEA 2024.1.1, you can also create a Kotlin Notebook as a scratch file.
Scratch files allow you to test small pieces of code without creating a new project or modifying an existing one.
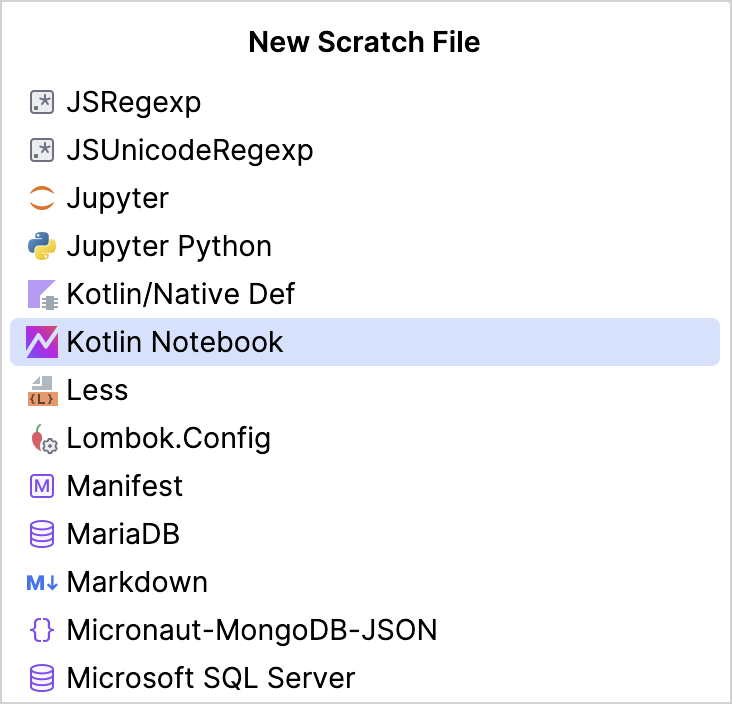
To create a scratch Kotlin Notebook:
- Click File | New | Scratch File.
Select Kotlin Notebook from the New Scratch File list.
Next step
In the next part of the tutorial, you will learn how to add dependencies to a Kotlin Notebook.