创建使用 Kotlin 的 Spring Boot 项目
This is the first part of the Get started with Spring Boot and Kotlin tutorial:
Create a Spring Boot project with Kotlin
Add a data class to the Spring Boot project
Add database support for the Spring Boot project
Use Spring Data CrudRepository for database access
The first part of the tutorial shows how to create a Spring Boot project with Gradle in IntelliJ IDEA using the Project Wizard.
This tutorial doesn't require using Gradle as the build system. You can follow the same steps if you use Maven.
Before you start
Download and install the latest version of IntelliJ IDEA Ultimate Edition.
If you use IntelliJ IDEA Community Edition or another IDE, you can generate a Spring Boot project using a web-based project generator.
Create a Spring Boot project
Create a new Spring Boot project with Kotlin by using the Project Wizard in IntelliJ IDEA Ultimate Edition:
- In IntelliJ IDEA, select File | New | Project.
- In the panel on the left, select New Project | Spring Boot.
Specify the following fields and options in the New Project window:
- Name: demo
- Language: Kotlin
Type: Gradle - Kotlin
This option specifies the build system and the DSL.
Package name: com.example.demo
JDK: Java JDK
This tutorial uses Amazon Corretto version 23. If you don't have a JDK installed, you can download it from the dropdown list.
Java: 17
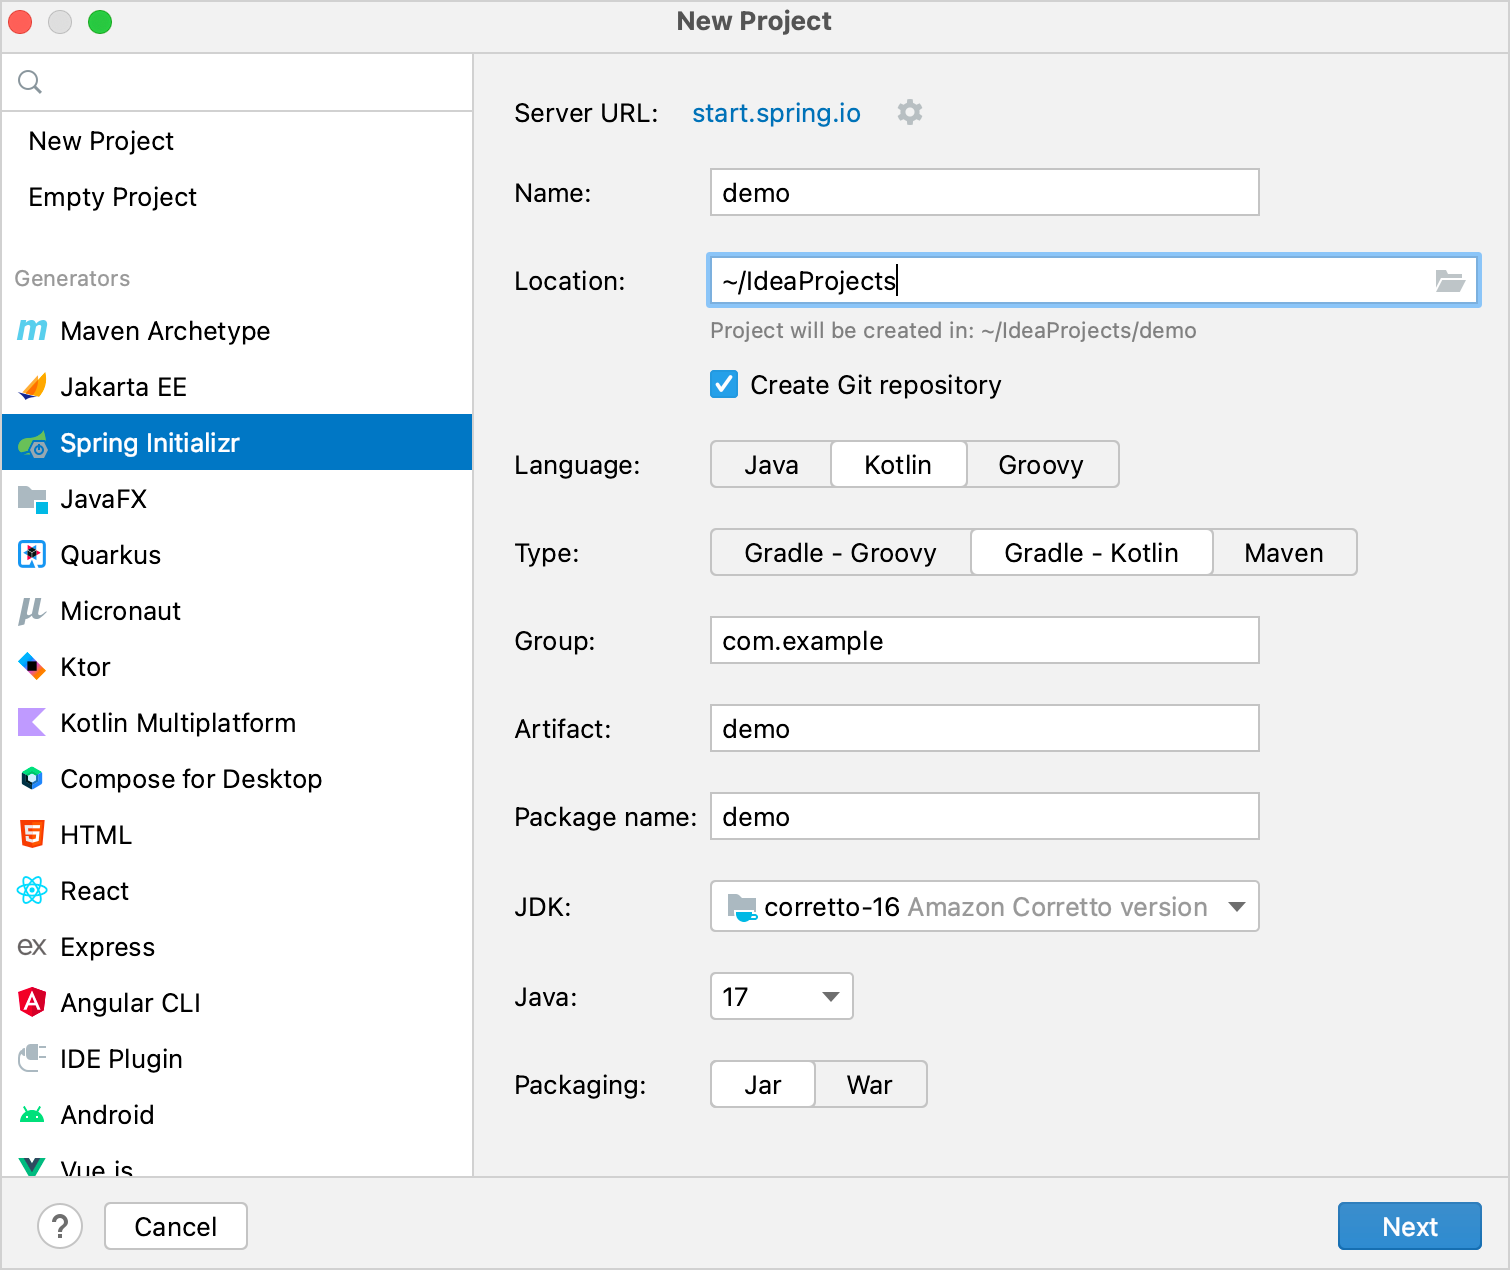
Ensure that you have specified all the fields and click Next.
Select the following dependencies that will be required for the tutorial:
- Web | Spring Web
- SQL | Spring Data JDBC
- SQL | H2 Database
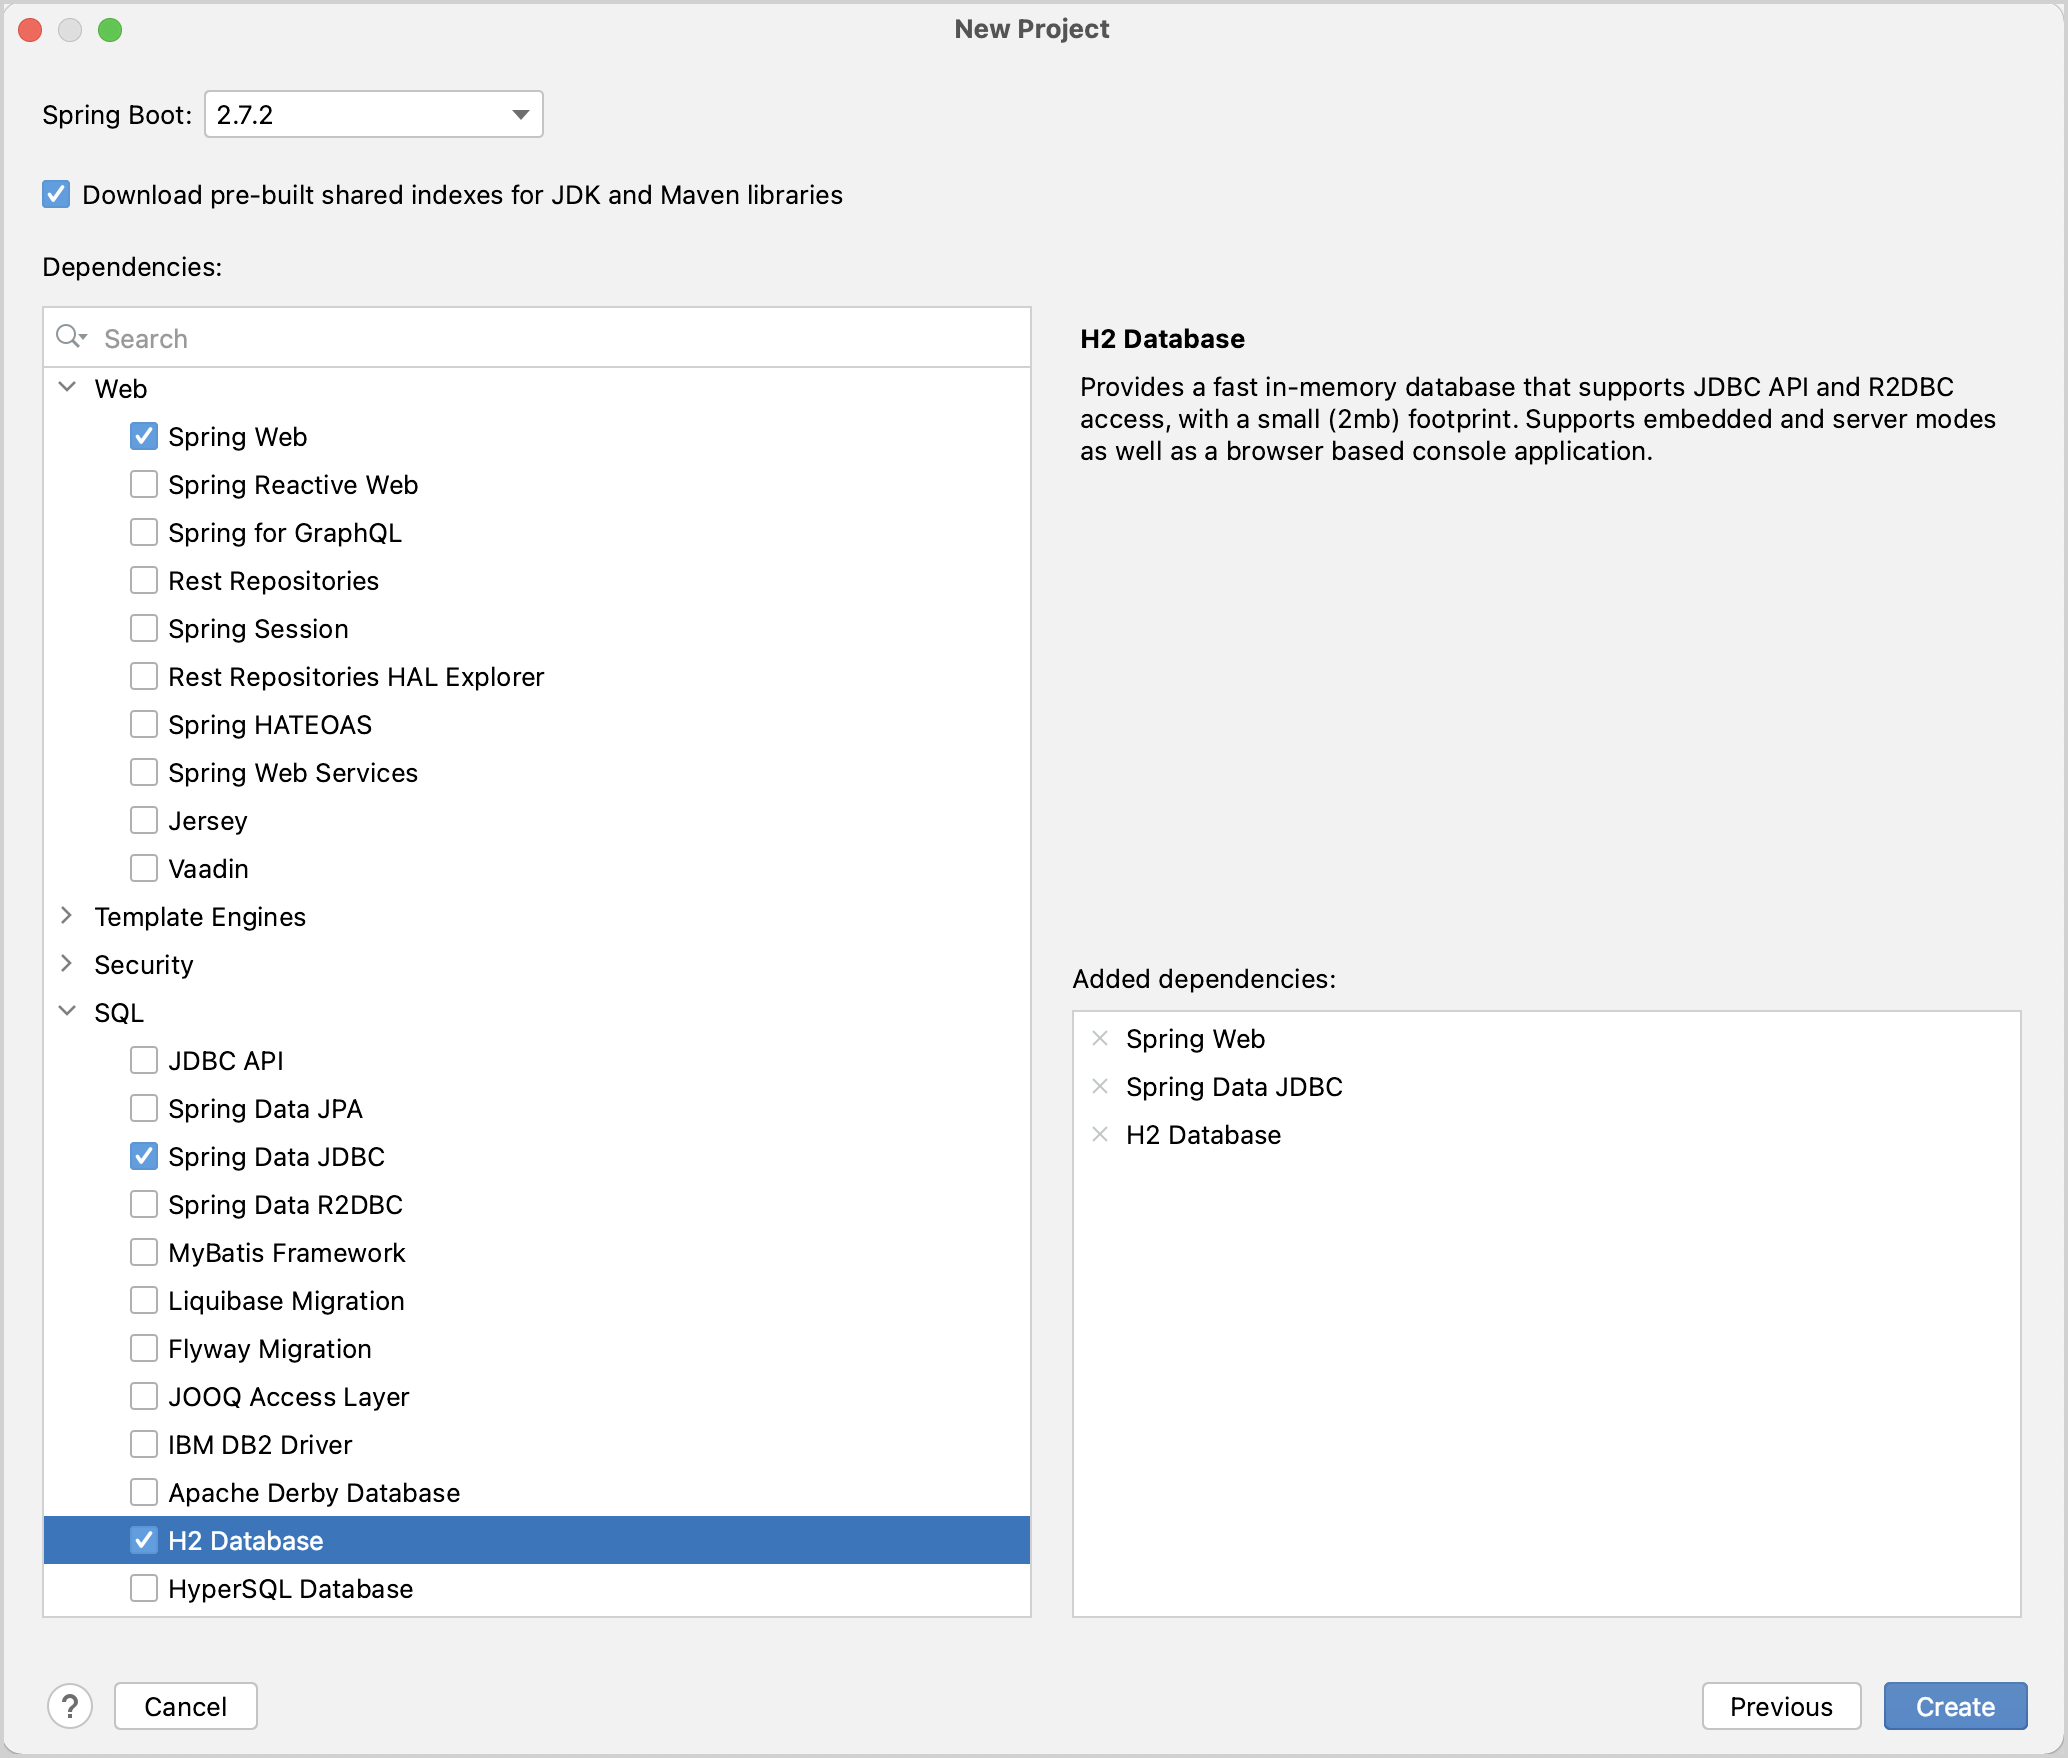
Click Create to generate and set up the project.
The IDE will generate and open a new project. It may take some time to download and import the project dependencies.
After this, you can observe the following structure in the Project view:
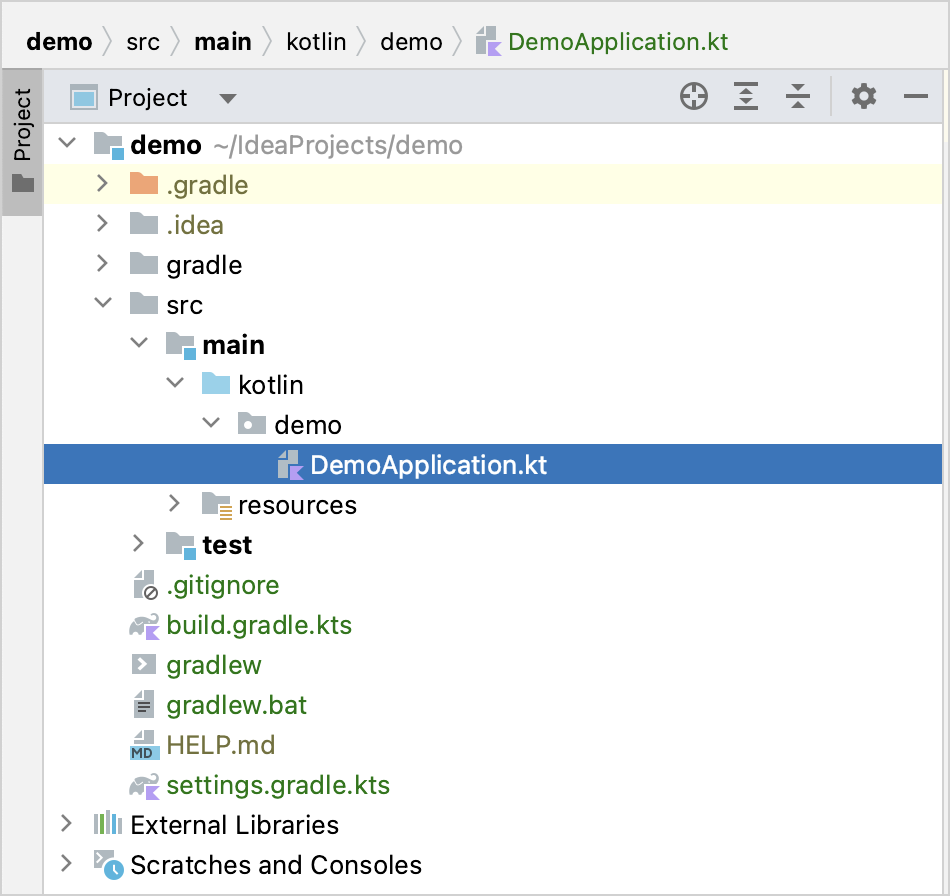
The generated Gradle project corresponds to the Maven's standard directory layout:
- There are packages and classes under the
main/kotlinfolder that belong to the application. - The entry point to the application is the
main()method of theDemoApplication.ktfile.
- There are packages and classes under the
Explore the project Gradle build file
Open the build.gradle.kts file: it is the Gradle Kotlin build script, which contains a list of the dependencies required for the application.
The Gradle file is standard for Spring Boot, but it also contains necessary Kotlin dependencies, including the kotlin-spring Gradle plugin – kotlin("plugin.spring").
Here is the full script with the explanation of all parts and dependencies:
// build.gradle.kts
plugins {
    kotlin("jvm") version "1.9.25" // The version of Kotlin to use
    kotlin("plugin.spring") version "1.9.25" // The Kotlin Spring plugin
    id("org.springframework.boot") version "3.4.5"
    id("io.spring.dependency-management") version "1.1.7"
}

group = "com.example"
version = "0.0.1-SNAPSHOT"

java {
    toolchain {
        languageVersion = JavaLanguageVersion.of(17)
    }
}

repositories {
    mavenCentral()
}

dependencies {
    implementation("org.springframework.boot:spring-boot-starter-data-jdbc")
    implementation("org.springframework.boot:spring-boot-starter-web")
    implementation("com.fasterxml.jackson.module:jackson-module-kotlin") // Jackson extensions for Kotlin for working with JSON
    implementation("org.jetbrains.kotlin:kotlin-reflect") // Kotlin reflection library, required for working with Spring
    runtimeOnly("com.h2database:h2")
    testImplementation("org.springframework.boot:spring-boot-starter-test")
    testImplementation("org.jetbrains.kotlin:kotlin-test-junit5")
    testRuntimeOnly("org.junit.platform:junit-platform-launcher")
}

kotlin {
    compilerOptions {
        freeCompilerArgs.addAll("-Xjsr305=strict") // `-Xjsr305=strict` enables the strict mode for JSR-305 annotations
    }
}

tasks.withType<Test> {
    useJUnitPlatform()
}
As you can see, there are a few Kotlin-related artifacts added to the Gradle build file:
In the
pluginsblock, there are two Kotlin artifacts:kotlin("jvm")– the plugin defines the version of Kotlin to be used in the projectkotlin("plugin.spring")– Kotlin Spring compiler plugin for adding theopenmodifier to Kotlin classes in order to make them compatible with Spring Framework features
In the
dependenciesblock, a few Kotlin-related modules listed:com.fasterxml.jackson.module:jackson-module-kotlin– the module adds support for serialization and deserialization of Kotlin classes and data classesorg.jetbrains.kotlin:kotlin-reflect– Kotlin reflection library
After the dependencies section, you can see the
kotlinplugin configuration block. This is where you can add extra arguments to the compiler to enable or disable various language features.
Learn more about the Kotlin compiler options in .
Explore the generated Spring Boot application
Open the DemoApplication.kt file:
// DemoApplication.kt
package com.example.demo

import org.springframework.boot.autoconfigure.SpringBootApplication
import org.springframework.boot.runApplication

@SpringBootApplication
class DemoApplication

fun main(args: Array<String>) {
    runApplication<DemoApplication>(*args)
}
Right after package declaration and import statements you can see the first class declaration, class DemoApplication.
In Kotlin, if a class doesn't include any members (properties or functions), you can omit the class body ({}) for good.
@SpringBootApplication annotation is a convenience annotation in a Spring Boot application.
It enables Spring Boot's auto-configuration, component scan, and be able to define an extra configuration on their "application class".
The main() function is the entry point to the application.
It is declared as a top-level function outside the DemoApplication class. The main() function invokes the Spring's runApplication(*args) function to start the application with the Spring Framework.
If you check the declaration of the runApplication() function, you will see that the parameter of the function is marked with vararg modifier: vararg args: String.
This means that you can pass a variable number of String arguments to the function.
The args is a parameter to the main() function declared as an array of Strings.
Since there is an array of strings, and you want to pass its content to the function, use the spread operator (prefix the array with a star sign *).
Create a controller
The application is ready to run, but let's update its logic first.
In the Spring application, a controller is used to handle the web requests.
In the same package, next to the DemoApplication.kt file, create the MessageController.kt file with the
MessageController class as follows:
// MessageController.kt
package com.example.demo

import org.springframework.web.bind.annotation.GetMapping
import org.springframework.web.bind.annotation.RequestParam
import org.springframework.web.bind.annotation.RestController

@RestController
class MessageController {
    @GetMapping("/")
    fun index(@RequestParam("name") name: String) = "Hello, $name!"
}
You need to tell Spring that MessageController is a REST Controller, so you should mark it with the @RestController annotation.
This annotation means this class will be picked up by the component scan because it's in the same package as our DemoApplication class.
@GetMapping marks the functions of the REST controller that implement the endpoints corresponding to HTTP GET calls:
The function parameter name is marked with @RequestParam annotation. This annotation indicates that a method parameter should be bound to a web request parameter.
Hence, if you access the application at the root and supply a request parameter called "name", like /?name=<your-value>, the parameter value will be used as an argument for invoking the index() function.
Since the index() function contains only one statement you can declare it as a single-expression function.
This means the curly braces can be omitted and the body is specified after the equals sign =.
The index() function does not declare the return type explicitly. Instead, the compiler infers the return type by looking at the result of the statement on the right-hand side from the equals sign =.
The type of Hello, $name! expression is String, hence the return type of the function is also String.
Hello, $name! expression is called a String template in Kotlin.
String templates are String literals that contain embedded expressions.
This is a convenient replacement for String concatenation operations.
Run the application
The Spring application is now ready to run:
In the
DemoApplication.ktfile, click the green Run icon in the gutter beside themain()method: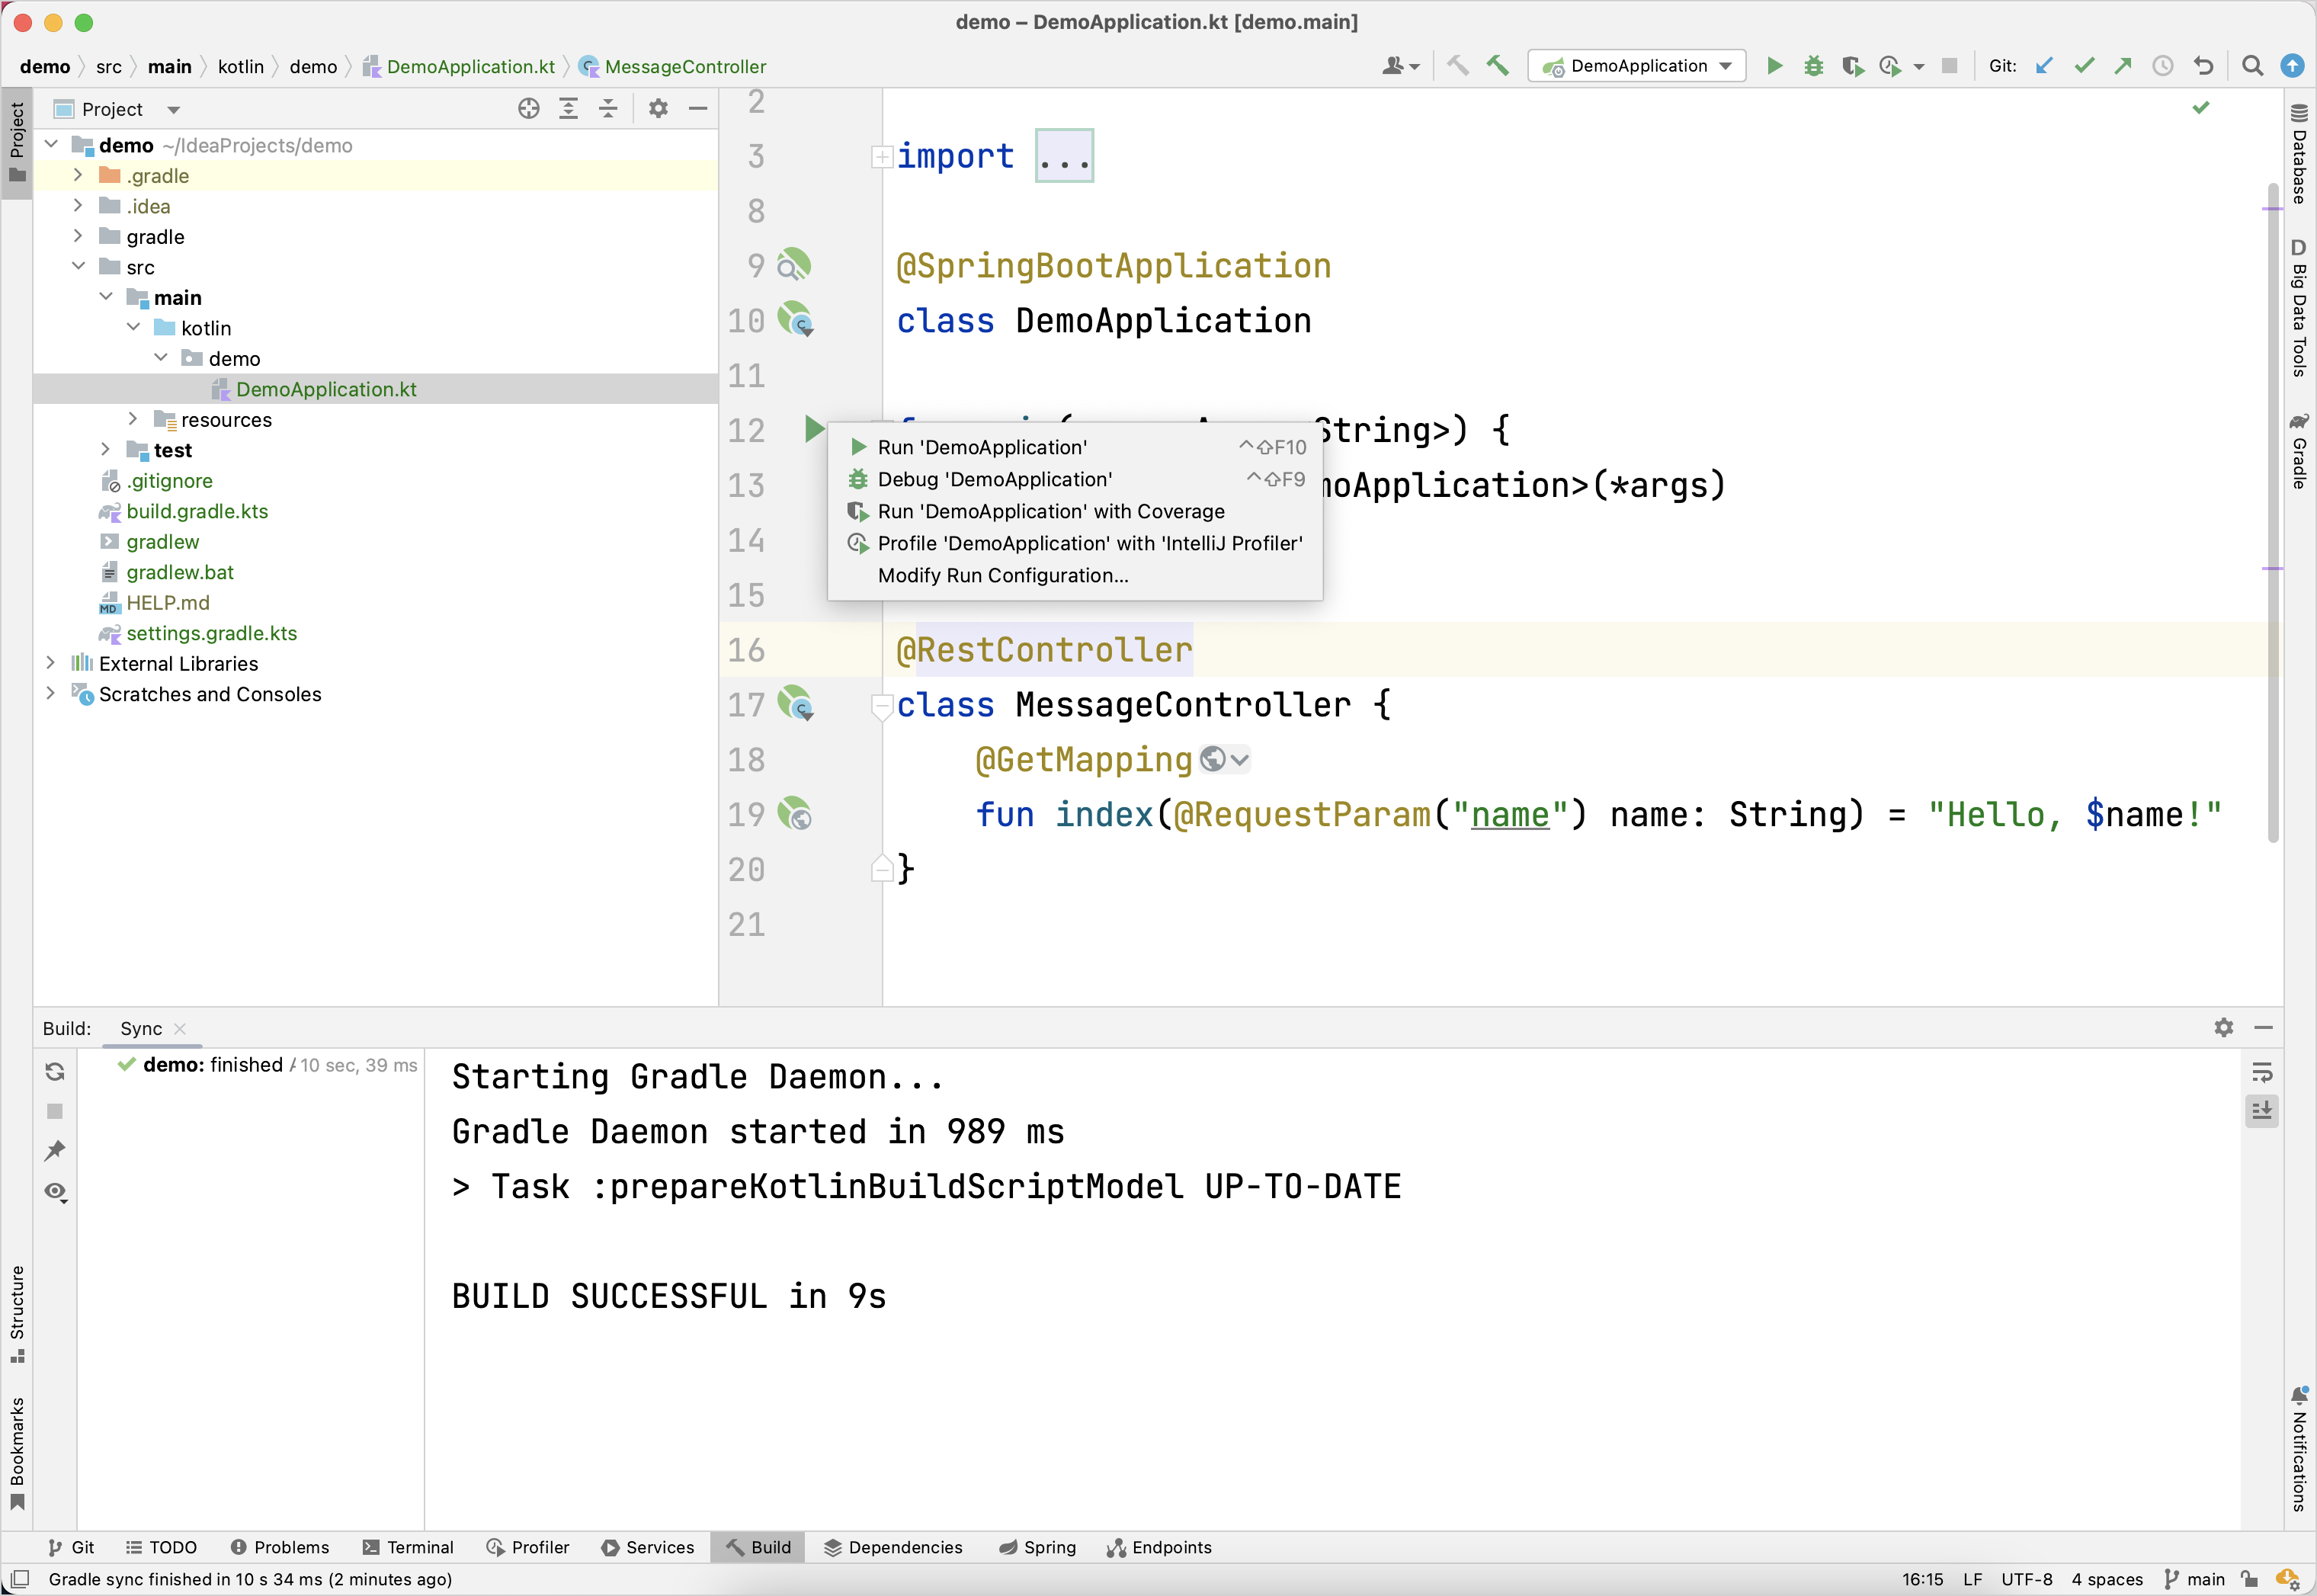
You can also run the
./gradlew bootRuncommand in the terminal.This starts the local server on your computer.
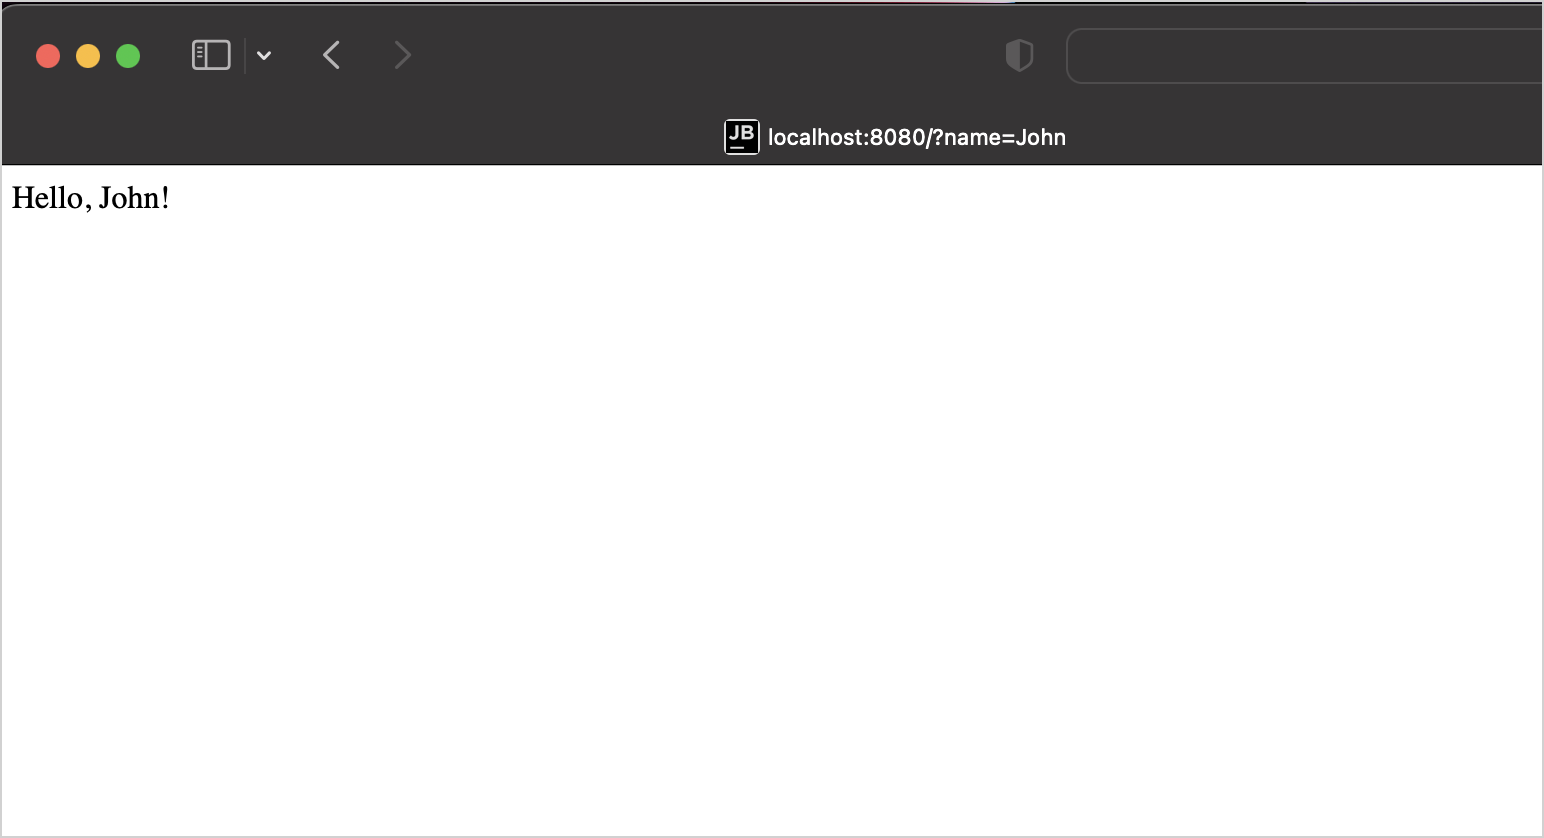
Once the application starts, open the following URL:
http://localhost:8080?name=JohnYou should see "Hello, John!" printed as a response:
Next step
In the next part of the tutorial, you'll learn about Kotlin data classes and how you can use them in your application.