创建使用 C 语言互操作与 libcurl 的应用——教程
This tutorial demonstrates how to use IntelliJ IDEA to create a command-line application. You'll learn how to create a simple HTTP client that can run natively on specified platforms using Kotlin/Native and the libcurl library.
The output will be an executable command-line app that you can run on macOS and Linux and make simple HTTP GET requests.
You can use the command line to generate a Kotlin library, either directly or with a script file (such as .sh or .bat file).
However, this approach doesn't scale well for larger projects that have hundreds of files and libraries.
Using a build system simplifies the process by downloading and caching the Kotlin/Native
compiler binaries and libraries with transitive dependencies, as well as by running the compiler and tests.
Kotlin/Native can use the Gradle build system through the Kotlin Multiplatform plugin.
Before you start
- Download and install the latest version of IntelliJ IDEA.
Clone the project template by selecting File | New | Project from Version Control in IntelliJ IDEA and using this URL:
https://github.com/Kotlin/kmp-native-wizardExplore the project structure:
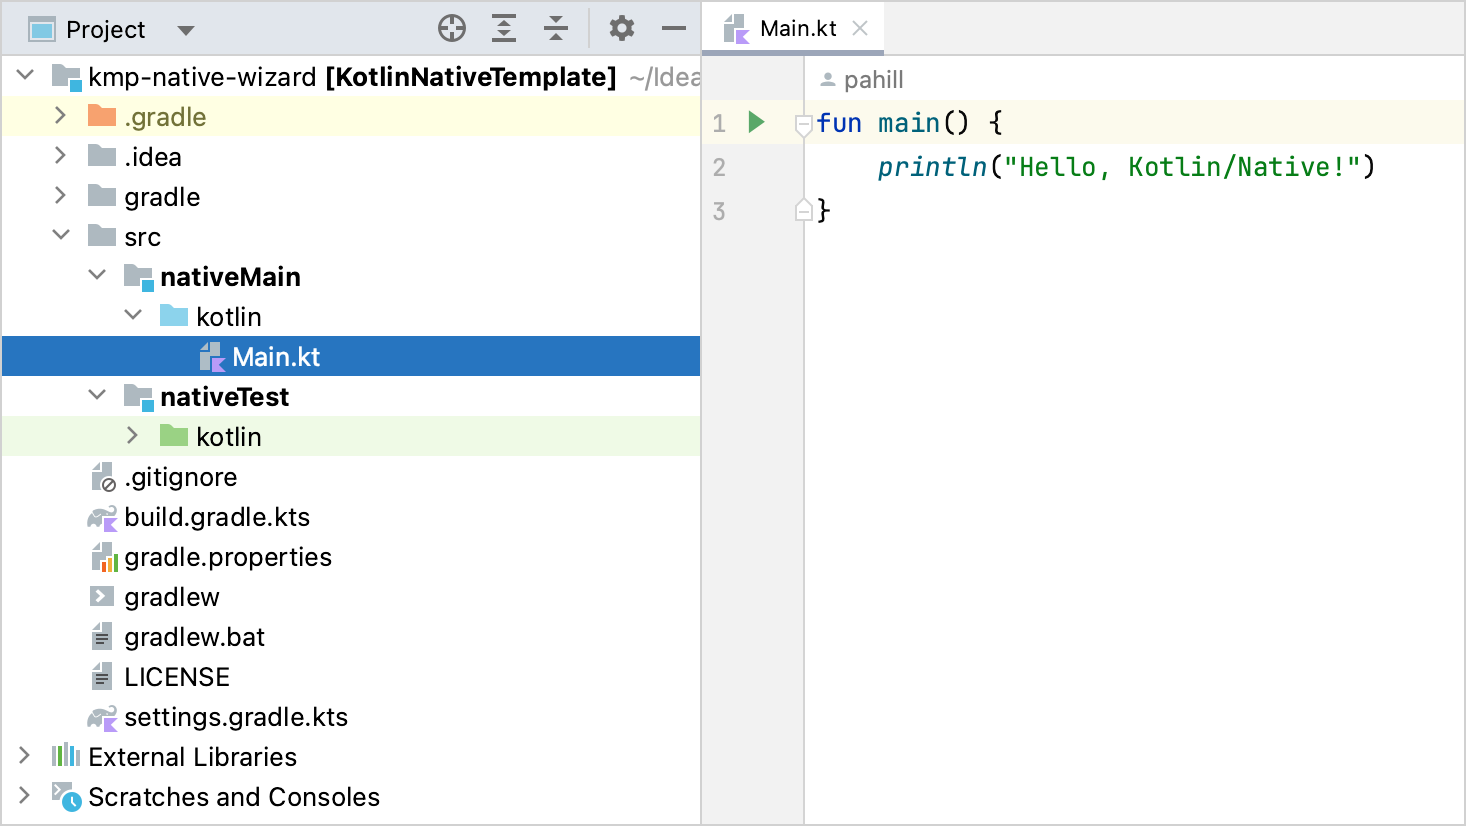
The template includes a project with the files and folders you need to get started. It's important to understand that an application written in Kotlin/Native can target different platforms if the code does not have platform-specific requirements. Your code is placed in the
nativeMaindirectory with a correspondingnativeTest. For this tutorial, keep the folder structure as is.Open the
build.gradle.ktsfile, the build script that contains the project settings. Pay special attention to the following in the build file:kotlin { val hostOs = System.getProperty("os.name") val isArm64 = System.getProperty("os.arch") == "aarch64" val isMingwX64 = hostOs.startsWith("Windows") val nativeTarget = when { hostOs == "Mac OS X" && isArm64 -> macosArm64("native") hostOs == "Mac OS X" && !isArm64 -> macosX64("native") hostOs == "Linux" && isArm64 -> linuxArm64("native") hostOs == "Linux" && !isArm64 -> linuxX64("native") isMingwX64 -> mingwX64("native") else -> throw GradleException("Host OS is not supported in Kotlin/Native.") } nativeTarget.apply { binaries { executable { entryPoint = "main" } } } }- Targets are defined using
macosArm64,macosX64,linuxArm64,linuxX64, andmingwX64for macOS, Linux, and Windows. See the complete list of supported platforms. - The
binaries {}block defines how the binary is generated and the entry point of the application. These can be left as default values. - C interoperability is configured as an additional step in the build. By default, all the symbols from C are
imported to the
interoppackage. You may want to import the whole package in.ktfiles. Learn more about how to configure it.
- Targets are defined using
创建一个定义文件
When writing native applications, you often need access to certain functionalities that are not included in the Kotlin standard library, such as making HTTP requests, reading and writing from disk, and so on.
Kotlin/Native helps consume standard C libraries, opening up an entire ecosystem of functionality that exists for pretty much anything you may need. Kotlin/Native is already shipped with a set of prebuilt platform libraries, which provide some additional common functionality to the standard library.
An ideal scenario for interop is to call C functions as if you are calling Kotlin functions, following the same signature and conventions. This is when the cinterop tool comes in handy. It takes a C library and generates the corresponding Kotlin bindings, so that the library can be used as if it were Kotlin code.
To generate these bindings, each library needs a definition file, usually with the same name as the library. This is a property file that describes exactly how the library should be consumed.
In this app, you'll need the libcurl library to make some HTTP calls. To create its definition file:
- Select the
srcfolder and create a new directory with File | New | Directory. - Name the new directory nativeInterop/cinterop. This is the default convention for header file locations,
though it can be overridden in the
build.gradle.ktsfile if you use a different location. - Select this new subfolder and create a new
libcurl.deffile with File | New | File. Update your file with the following code:
headers = curl/curl.h headerFilter = curl/* compilerOpts.linux = -I/usr/include -I/usr/include/x86_64-linux-gnu linkerOpts.osx = -L/opt/local/lib -L/usr/local/opt/curl/lib -lcurl linkerOpts.linux = -L/usr/lib/x86_64-linux-gnu -lcurlheadersis the list of header files to generate Kotlin stubs for. You can add multiple files here, separating each with a space. In this case, it's onlycurl.h. The referenced files need to be available on the specified path (in this case, it's/usr/include/curl).headerFiltershows what exactly is included. In C, all the headers are also included when one file references another one with the#includedirective. Sometimes it's not necessary, and you can add this parameter using glob patterns) to make adjustments.You can use
headerFilterif you don't want to fetch external dependencies (such as systemstdint.hheader) into the interop library. Also, it may be useful for library size optimization and fixing potential conflicts between the system and the provided Kotlin/Native compilation environment.If the behavior for a certain platform needs to be modified, you can use a format like
compilerOpts.osxorcompilerOpts.linuxto provide platform-specific values to the options. In this case, they are macOS (the.osxsuffix) and Linux (the.linuxsuffix). Parameters without a suffix are also possible (for example,linkerOpts=) and applied to all platforms.
For the full list of available options, see Definition file.
You need to have the
curllibrary binaries on your system to make the sample work. On macOS and Linux, they are usually included. On Windows, you can build it from sources (you'll need Microsoft Visual Studio or Windows SDK command-line tools). For more details, see the related blog post. Alternatively, you may want to consider a MinGW/MSYS2curlbinary.
将互操作添加到构建过程
To use header files, make sure they are generated as a part of the build process. For this, add the following
compilations {} block to the build.gradle.kts file:
nativeTarget.apply {
    compilations.getByName("main") {
        cinterops {
            val libcurl by creating
        }
    }
    binaries {
        executable {
            entryPoint = "main"
        }
    }
}
First, cinterops is added, and then an entry for a definition file. By default, the name of the file is used.
You can override this with additional parameters:
cinterops {
    val libcurl by creating {
        definitionFile.set(project.file("src/nativeInterop/cinterop/libcurl.def"))
        packageName("com.jetbrains.handson.http")
        compilerOpts("-I/path")
        includeDirs.allHeaders("path")
    }
}
编写应用程序代码
Now that you have the library and the corresponding Kotlin stubs, you can use them from your application. For this tutorial, convert the simple.c example to Kotlin.
In the src/nativeMain/kotlin/ folder, update your Main.kt file with the following code:
import kotlinx.cinterop.*
import libcurl.*

@OptIn(ExperimentalForeignApi::class)
fun main(args: Array<String>) {
    val curl = curl_easy_init()
    if (curl != null) {
        curl_easy_setopt(curl, CURLOPT_URL, "https://example.com")
        curl_easy_setopt(curl, CURLOPT_FOLLOWLOCATION, 1L)
        val res = curl_easy_perform(curl)
        if (res != CURLE_OK) {
            println("curl_easy_perform() failed ${curl_easy_strerror(res)?.toKString()}")
        }
        curl_easy_cleanup(curl)
    }
}
As you can see, explicit variable declarations are eliminated in the Kotlin version, but everything else is pretty much the same as the C version. All the calls you'd expect in the libcurl library are available in the Kotlin equivalent.
This is a line-by-line literal translation. You could also write this in a more Kotlin idiomatic way.
编译与运行应用程序
Compile the application. To do that, run the
runDebugExecutableNativeGradle task from the task list or use the following command in the terminal:./gradlew runDebugExecutableNativeIn this case, the part generated by the cinterop tool is implicitly included in the build.
If there are no errors during compilation, click the green Run icon in the gutter next to the
main()function or use theShift + Cmd + R /Shift + F10 shortcut.IntelliJ IDEA opens the Run tab and shows the output — the contents of example.com:
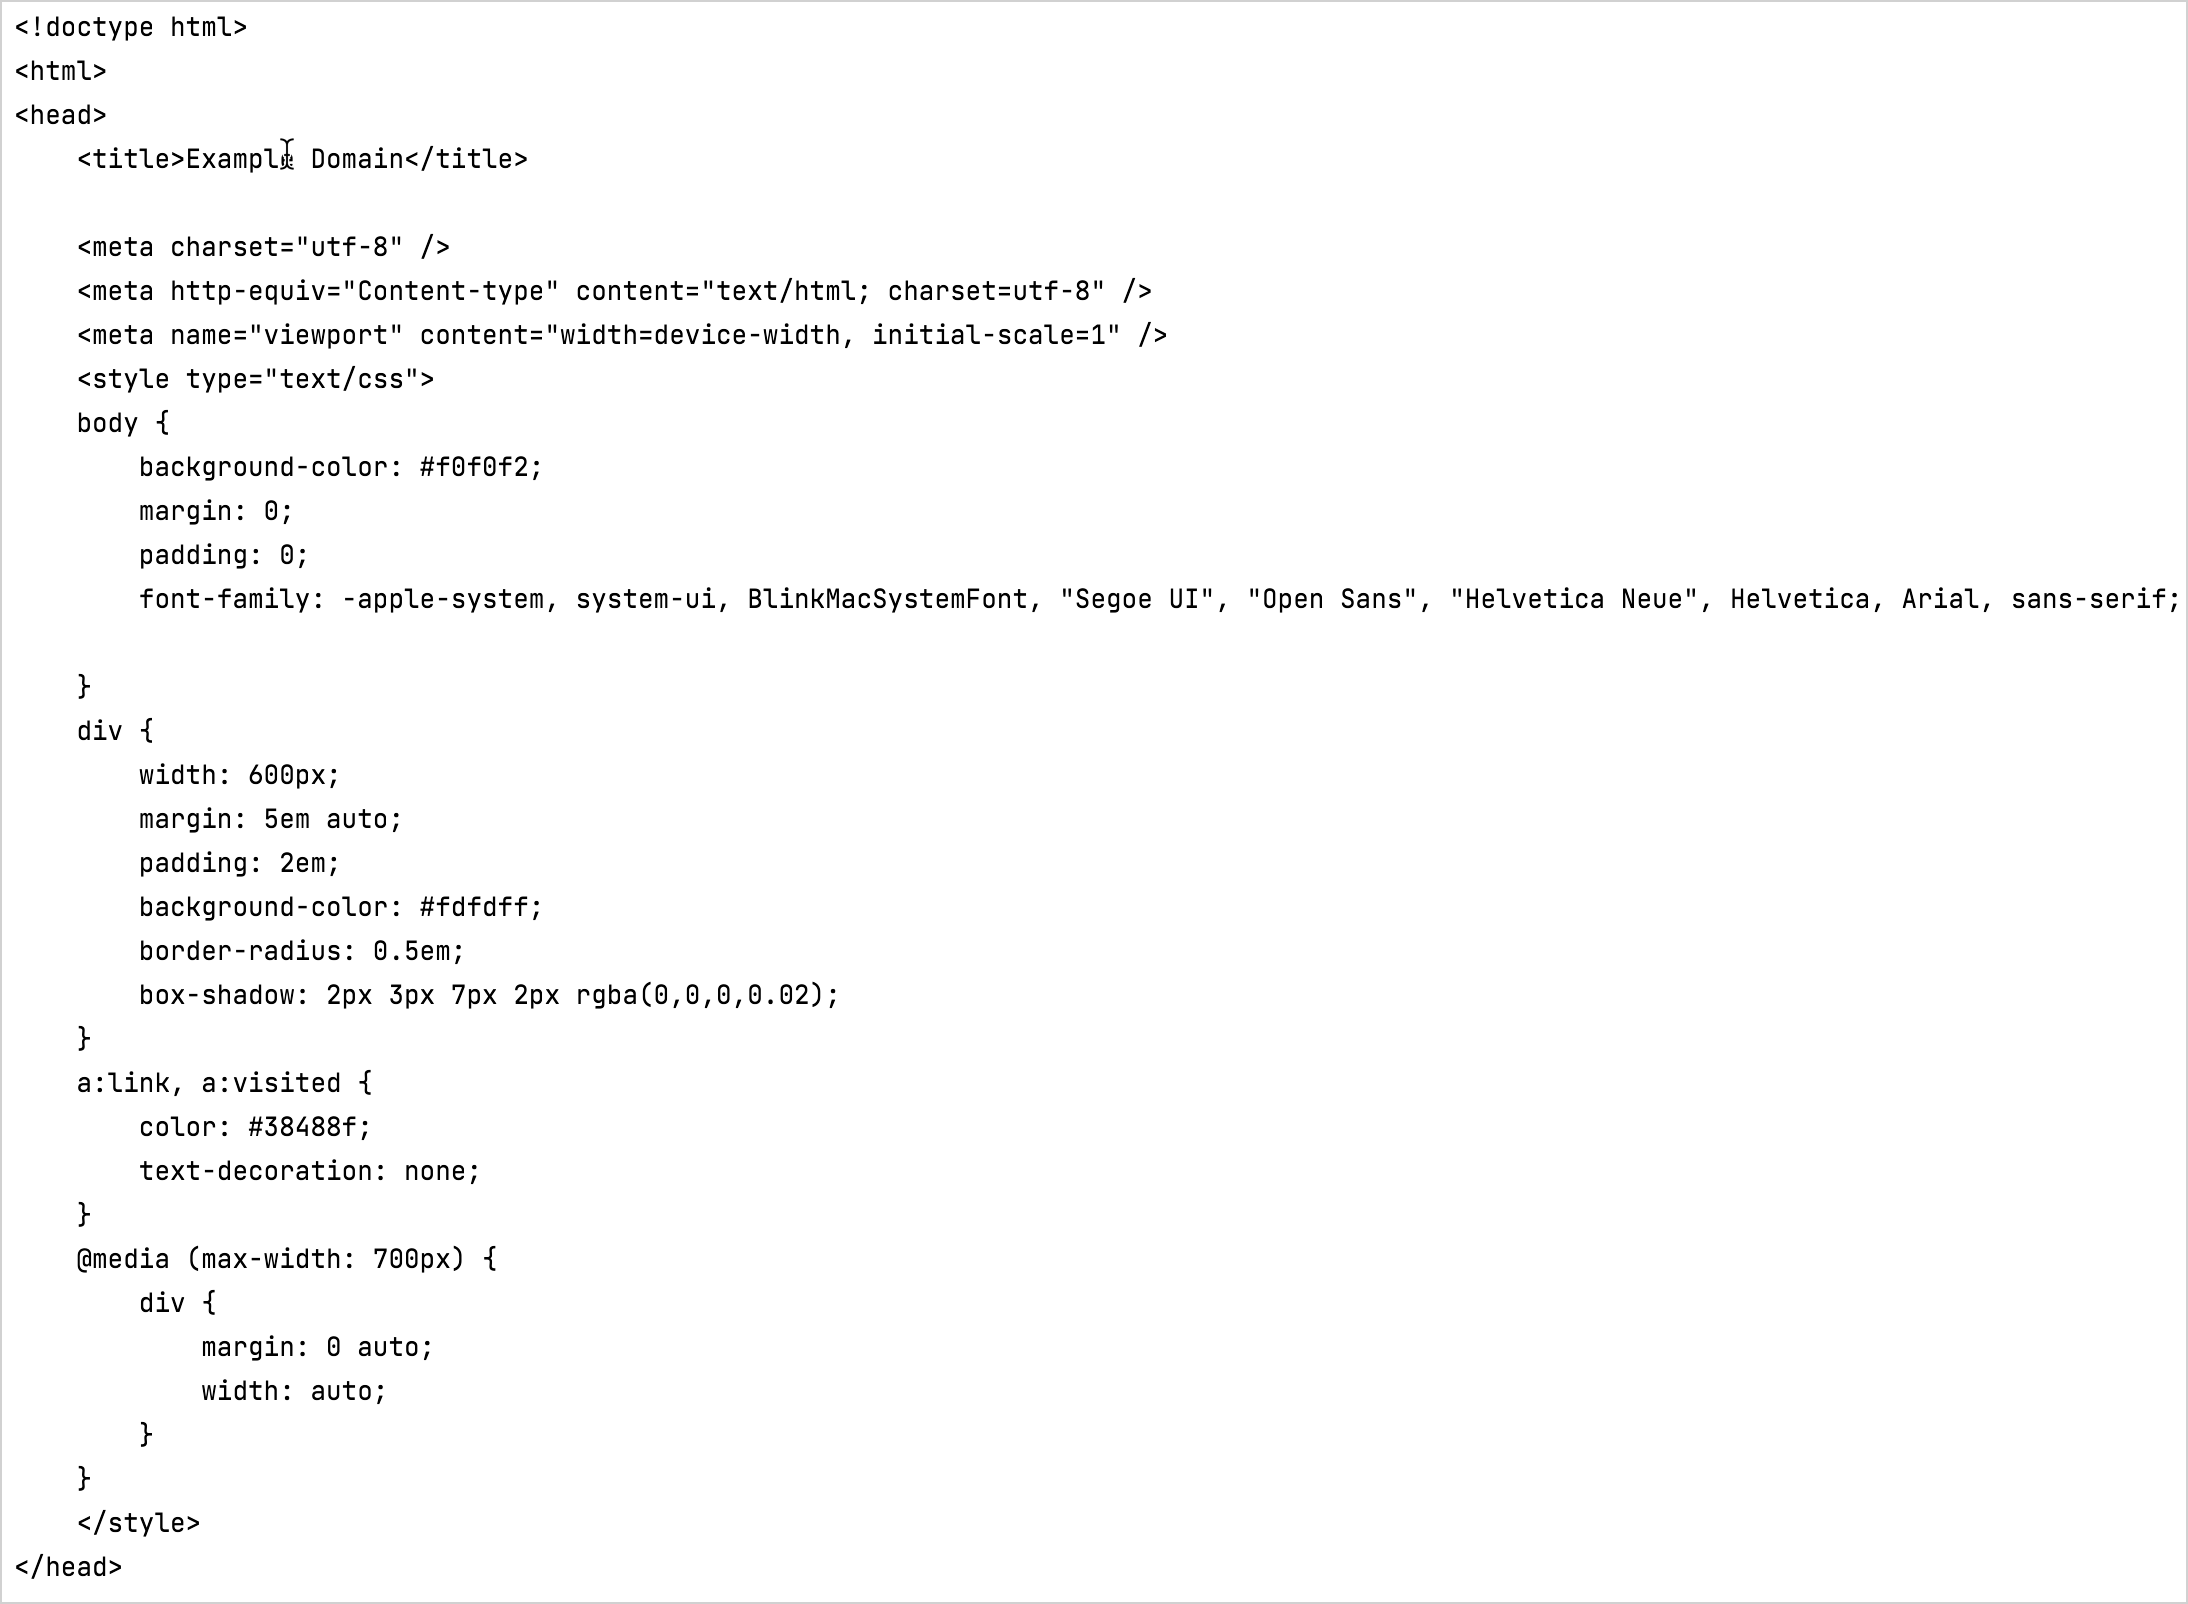
You can see the actual output because the call curl_easy_perform prints the result to the standard output. You could
hide this using curl_easy_setopt.
You can get the full project code in our GitHub repository.
下一步做什么
Learn more about Kotlin's interoperability with C.