使用 Kotlin 项目作为 CocoaPods 依赖项
You can use an entire Kotlin project as a Pod dependency. To do that, you'll need to include such a dependency in the Podfile of your project, specifying its name and the path to the project directory with the generated Podspec.
This dependency will be automatically built (and rebuilt) along with this project. Such an approach simplifies importing to Xcode by removing a need to write the corresponding Gradle tasks and Xcode build steps manually.
You can add dependencies between a Kotlin project and an Xcode project with one or several targets. It's also
possible to add dependencies between a Kotlin project and multiple Xcode projects. However, in this case,
you need to call pod install manually for each Xcode project. With a single Xcode project, it's done automatically.
- To correctly import the dependencies into the Kotlin/Native module, the Podfile must contain either
use_modular_headers!oruse_frameworks!directives.- If you don't specify the minimum deployment target version and a dependency Pod requires a higher deployment target, you'll get an error.
{style="note"}
Xcode project with one target
To use a Kotlin project as a Pod dependency in the Xcode project with one target:
- Create an Xcode project if you don't have one.
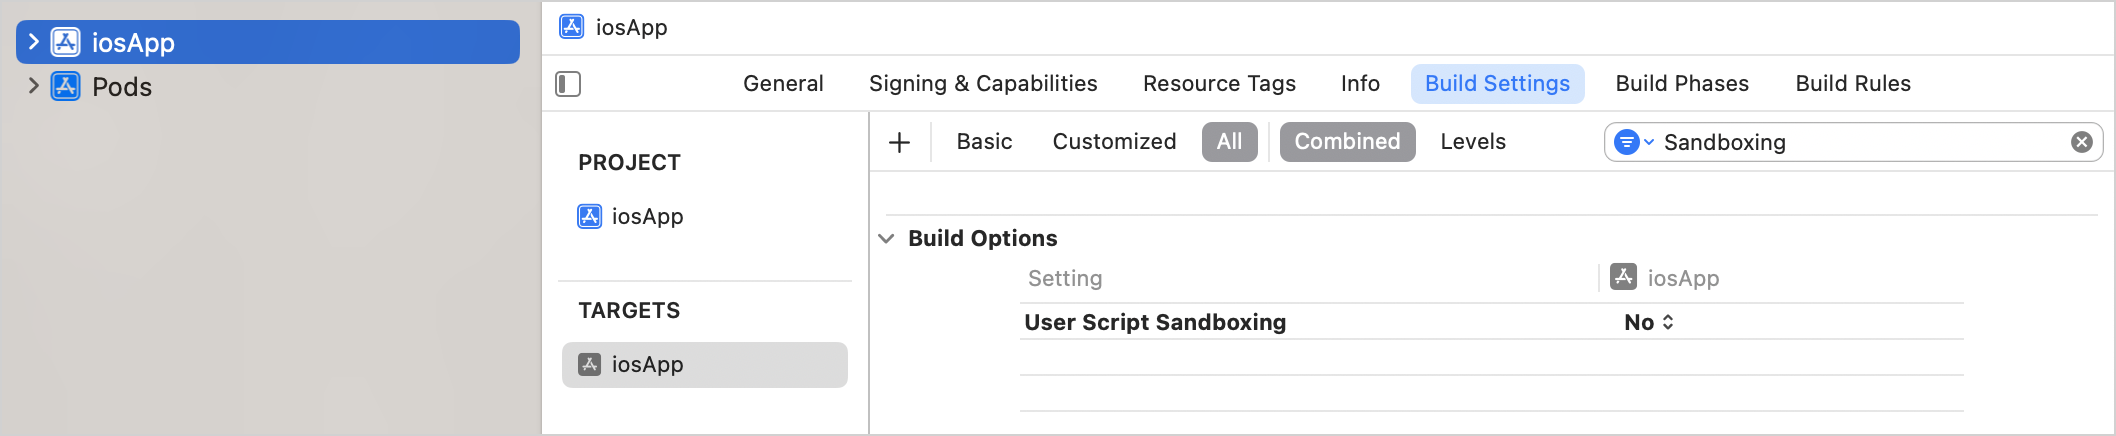
In Xcode, ensure to disable User Script Sandboxing under Build Options in the application target:
In the iOS part of your Kotlin project, create a Podfile.
In the shared module's
build.gradle(.kts)file, add the path to the Podfile withpodfile = project.file().This step helps synchronize your Xcode project with Kotlin project dependencies by calling
pod installfor your Podfile.Specify the minimum deployment target version for the Pod library:
 kotlin {
     iosArm64()

     cocoapods {
         version = "2.0"
         summary = "CocoaPods test library"
         homepage = "https://github.com/JetBrains/kotlin"
         ios.deploymentTarget = "16.0"

         pod("SDWebImage") {
             version = "5.20.0"
         }
         podfile = project.file("../ios-app/Podfile")
     }
 }
In the Podfile, add the name and path of the Kotlin project you want to include in the Xcode project:
 target 'ios-app' do
     use_frameworks!
     platform :ios, '16.0'

     # Pods for iosApp
     pod 'kotlin_library', :path => '../kotlin-library'
 end
Run
pod installin your project directory.When you run
pod installfor the first time, it creates the.xcworkspacefile. This file includes your original.xcodeprojand the CocoaPods project.- Close your
.xcodeprojand open the new.xcworkspacefile instead. This way you avoid issues with project dependencies. - Run Build | Reload All Gradle Projects in IntelliJ IDEA (or File | Sync Project with Gradle Files in Android Studio) to re-import the project.
Xcode project with several targets
To use a Kotlin project as a Pod dependency in the Xcode project with several targets:
- Create an Xcode project if you don't have one.
- In the iOS part of your Kotlin project, create a Podfile.
In the shared module's
build.gradle(.kts)file, add the path to your project's Podfile withpodfile = project.file().This step helps synchronize your Xcode project with Kotlin project dependencies by calling
pod installfor your Podfile.- Add dependencies to the Pod libraries you want to use in your project with
pod(). For each target, specify the minimum deployment target version for the Pod library:
 kotlin {
     iosArm64()
     tvosArm64()

     cocoapods {
         version = "2.0"
         summary = "CocoaPods test library"
         homepage = "https://github.com/JetBrains/kotlin"
         ios.deploymentTarget = "16.0"
         tvos.deploymentTarget = "16.0"

         pod("SDWebImage") {
             version = "5.20.0"
         }
         // Specify the path to the Podfile
         podfile = project.file("../severalTargetsXcodeProject/Podfile")
     }
 }
In the Podfile, add the name and path of the Kotlin project you want to include in the Xcode project:
 target 'iosApp' do
   use_frameworks!
   platform :ios, '16.0'

   # Pods for iosApp
   pod 'kotlin_library', :path => '../kotlin-library'
 end

 target 'TVosApp' do
   use_frameworks!
   platform :tvos, '16.0'

   # Pods for TVosApp
   pod 'kotlin_library', :path => '../kotlin-library'
 end
Run
pod installin your project directory.When you run
pod installfor the first time, it creates the.xcworkspacefile. This file includes your original.xcodeprojand the CocoaPods project.- Close your
.xcodeprojand open the new.xcworkspacefile instead. This way you avoid issues with project dependencies. - Run Build | Reload All Gradle Projects in IntelliJ IDEA (or File | Sync Project with Gradle Files in Android Studio) to re-import the project.